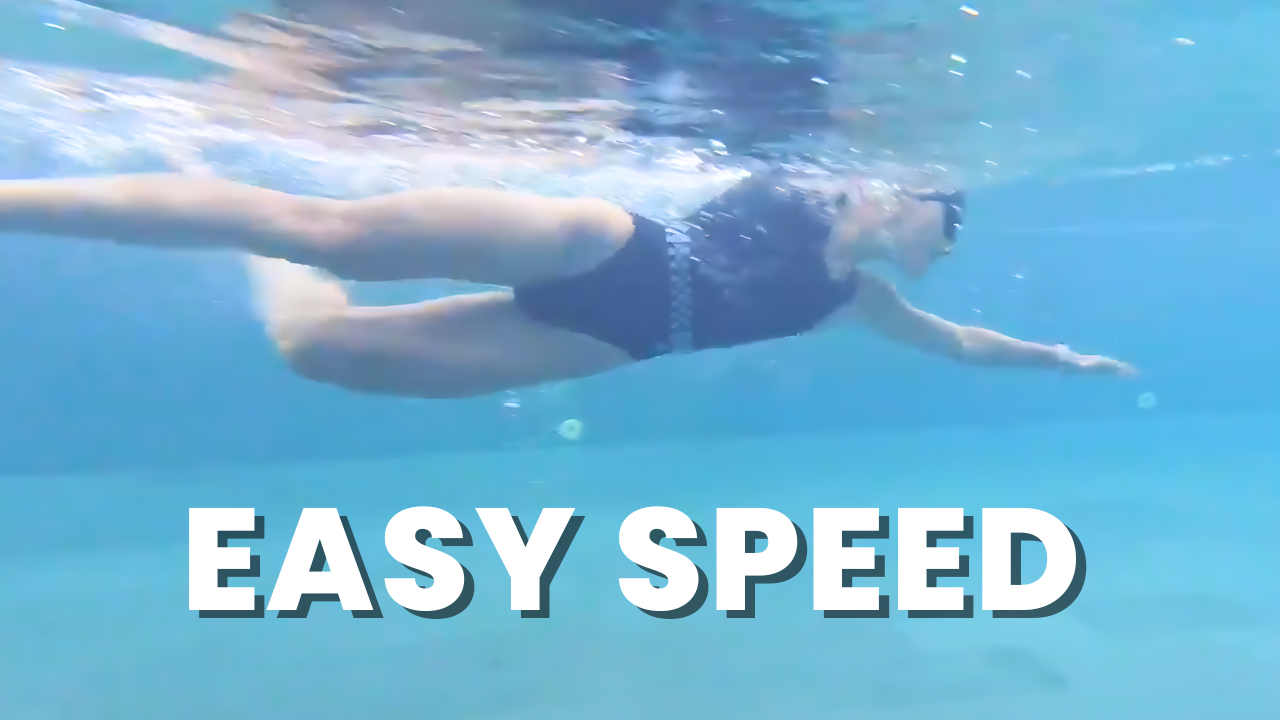

In this week’s episode, we look at a swimmer with a smooth stroke who doing a lot right. There’s still room for him to improve by changing his head position, alignment when breathing and developing a more effective catch and pull.
Transcription:
… too fast. So what we tend to see there when someone goes too far, yeah, either they’ll crossover here, but it will often throw their balance out a bit.
Hi. Brenton here. Welcome to Feedback Friday. If you’re new to these videos, this is where we analyze someone’s stroke and we look at what they could do to swim faster. So in today’s video, we’re looking at an athlete who sent their video into us.
Now one of the first things I like to look at is breathing. If you find that you are tiring very quickly and you feel like it’s hard to make 50 or 100 meters, one of the things that can cause that is the breathing. So when we look under the water, we want to see a light exhale through the nose, and then as they turn their head to breathe through here, we want to see a big puff of air out through the nose.
So you can see this gradual exhalation, which is good. There’s not a big exhalation as he’s turning his head to breathe, so he might be able to be a bit more assertive with that exhale, a bigger puff of air while he’s turning his head. That might help him clear his lungs. But overall, I think he’s probably swimming quite comfortably, so it’s not a big concern.
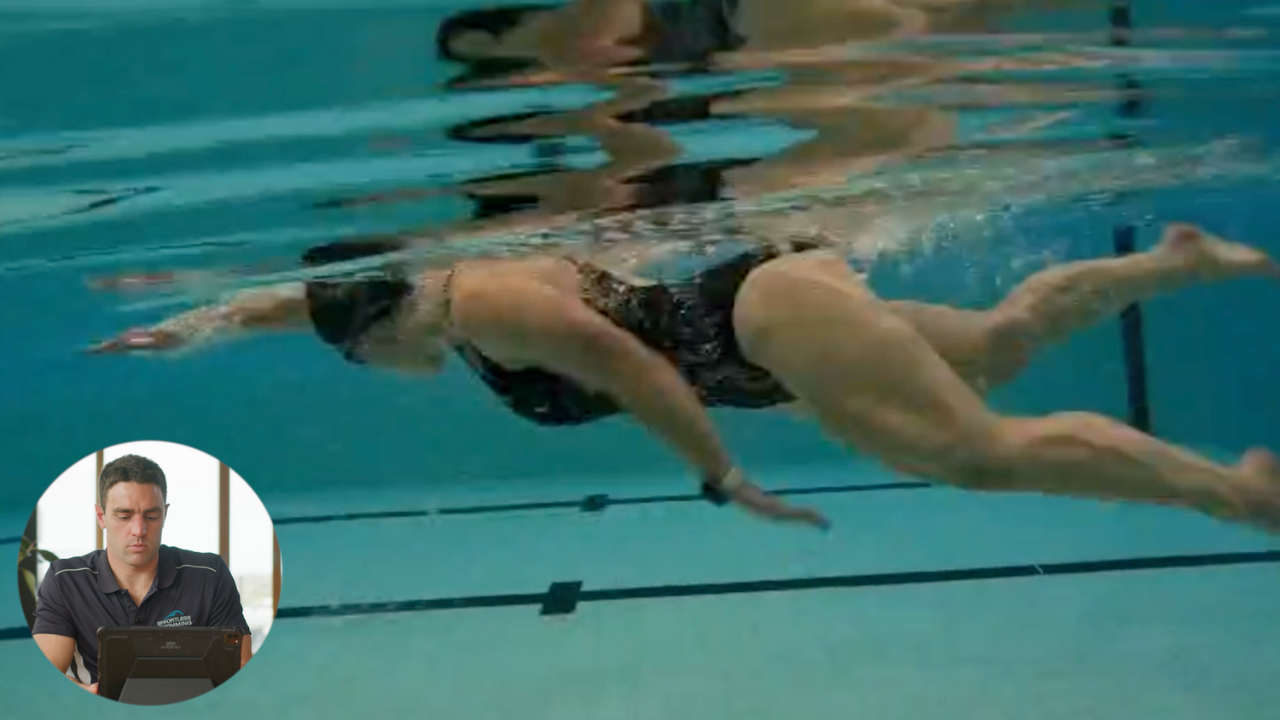
The next thing that I like to look at is from the body position. If we look from the side, here you can see that the head is at the top of the water, this is good. We would like to get their hips and the heels a little bit higher. There seems to be a bit of a drop through there. One of the best things that you can do for your stroke is to minimize drag, that’s really got to be the number one priority. Because if your legs and your hips are dropping down, if you’re creating a lot of extra drag, that is going to slow you down. It takes too much energy to overcome that drag.
You can see here that his overall body position, not all the time, but through some of it, is just a little bit too low. So he’s going to be copying quite a bit of drag through here and it’s going to be very hard to overcome that with the amount of energy required to do so. So what we look at there is, all right, well, what’s causing the legs to drop? One of the first things we often look for there is head position, and I’m not a coach who suggests looking straight down for everyone, that is certainly not the case. We work with a lot of triathletes and open water swimmers, and you actually find a lot of them look somewhat forward in this sort of range. So, I don’t mind if he’s looking somewhat forwards.
To me, it seems as though, at times, he is probably a bit far out there, which could very likely be causing his hips and legs to drop. So with this swimmer, he may want to try and look a little bit further down. As I said, it doesn’t need to be straight down. A little bit further down, but the cue that I like to think of here is extend or lengthen through the back of the neck. So if you feel like someone is here above you, you’ve got a piece of rope attached all the way through your neck, through your spine, and they’re pulling that rope towards them. That’s kind of how you want it to feel through your head, keep it long through there.
So by doing that, that might bring his hips and his legs up towards the surface and get horizontal in the water. That might fix that 100%, but sometimes there is other things as well that can be causing it. My guess is the other maybe 50% of what’s causing his lower half to drop, is probably what’s happening in the catch phase of the stroke.
So once the arm’s out in front, so from here through to about here, that’s what we consider the catch phase of the stroke. Some coaches will talk about that as the press phase or the set up phase. So basically from there to there, if you’re pressing it down on the water too much, that will press the chest up nice and high, but often has the effect of dropping the legs down. So if this swimmer can adjust or improve his catch and get himself in a position where he’s not pressing down too much, he’s just getting his hand and forearm in a way that’s angled to press mostly back, that could also improve his body position there. So that’s something that we would like to look at.
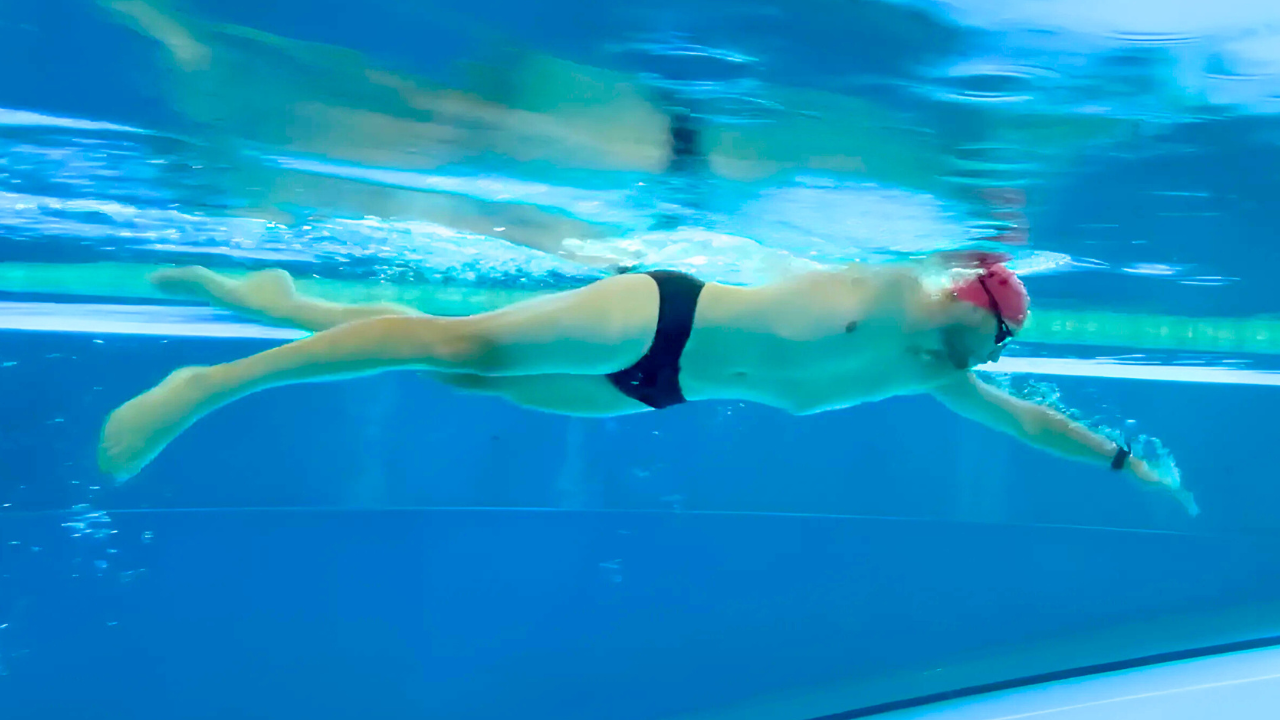
Now, if we look at the alignment from above, so this bird’s eye view, you’ll see that generally is pretty good. So this left hand enters really nicely, it’s in line with his shoulder. He’s extending straight forward, and that’s a good line through his body. You can see that there’s not that much he could do to reduce the drag in that part of the stroke there. So that’s really good. Right-hand side, there’s a little bit of a crossover going on. You can see, all right, that’s where his shoulders, that hand’s crossed over a little bit.
I don’t mind coming close to the center, but we generally want to just try and avoid crossing it. But it sets up pretty well there. To me, it’s just on those breathing strokes that you can see it crosses over. So right here, the hand enters well. He’s setting up well, but just as he goes to breathe, you’ll notice that’s where the hand comes across the body. We also get the hips coming off to the side a bit there. So from a drag perspective, that’s going to slow him down. It’s also probably just throwing his balance off a bit.
What we would probably want to look at here is you can see how his shoulders may be rotating too far, which could be part of the reason why he’s sort of crossing over there. So if we cut to the front view, we’ll see here that on some of these breathing strokes, particularly to that left one, yeah, he might be rotating a little bit far. Yeah, might be rotating a little bit far. The way we sort of determine that is, I like to look at what’s the angle through the shoulders at its furthest point of rotation. What we often see with most of lead swimmers, it’s around sort of 40, 45 degrees. A bit more, a bit less, somewhere in that range though. Think of it as like 45 degrees and that will set you up well.
Here he’s gone a bit too far around that sort of 68 degrees, maybe a little bit less, which is a little bit too fast. So what we tend to see there when someone goes too far, yeah, either they’ll cross over here, but it will often throw their balance out a bit. So what I’d probably recommend for this swimmer to change that, to improve it, do a drill like the FKB drill, which is where you’re basically kicking front on, and I’ll play a video of it here. It’s where you’re kicking face down in the water, got one arm out in front, one arm by the side. All you’re looking to do there is try and get your breath straight to the side, while this arm stays out in front of you.
So the FKB drill, which is short for the front, kick, breathe, that can help you basically hold your line, keep that arm in line with your shoulder as you were getting the breath. It can also help you, just make sure that you’re not over-rotating in that breathing stroke. This is probably the second thing we’d look to do. So the first thing, adjust the head position. Secondly, adjust the position that he’s breathing in. So just keep that alignment when he’s getting the breath.
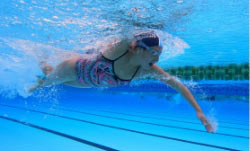
Then probably the third thing I’d really be sort of looking to do here, and this is all sort of one major point, but it would make probably the biggest difference, in terms of the speed. We’ll be changing the or working on the catch in the pool. So the first thing we can see here is, yeah, he’s got a nice entry, he’s got the fingers going first, he’s extending forward as well. When he finishes reaching forwards though, his hand is a bit deep, and this is with both arms.
So what we tend to aim for here is we want the fingers below the wrist, wrist below the elbow. You’ve probably heard me talk about that a bit before. We want that position, and if your hand goes down too deep after you finished reaching forward, so let’s say it goes here, again, it’s just going to be more drag. The other thing that happens there is you miss out on the first 10, 15 centimeters of the setup phase or the catch phase there. So just means it’s a little bit harder to get a good catch there.
It’s probably a bit more obvious on this left-hand side too. So the left hand, yep, entering well, extending forwards. When he finishes reaching forwards, just a bit too deep. So if he kept his hand up about 10, 15 centimeters higher and he had just a very slight downward angle with the arm there, from a drag perspective, much more effective. From setting up the catch, much more effective as well.
So what we could do there, a really simple drill, one that we love to do in clinics, one that we do at camps and I give to a lot of the swimmers when they join our online coaching. One of the first things that we’ll often have to do is just make sure that they’re starting their catch in that right position. So the front kick drill, which is you kicking face down in the water with both hands out in front of you, that is a great drill. Just to work on getting the right depth of the hands.
The thing with pretty much everything out in front of you, what you feel is right. If you feel like you’re doing it right, you may not be. So you often have to sort of just look forwards, check your position, and if it’s incorrect, make that change. So, our sense of awareness out here is often very skewed. So, it can be very good to check those things, either by looking at it, by filming yourself, just one of those things to know exactly where you are out in front there.
So we’d look to get that starting catch position right. Then after that, we’d really just want to work on the catch in the pool. So in one of the videos that I think is probably best for most people to see if they’re thinking about working on their catch in their pool, is our video which talks about the four key positions in the catch in pool. I’ll link to that below, that’ll be in the description. Have a look at that video, if you haven’t seen it yet. So look at that afterward.
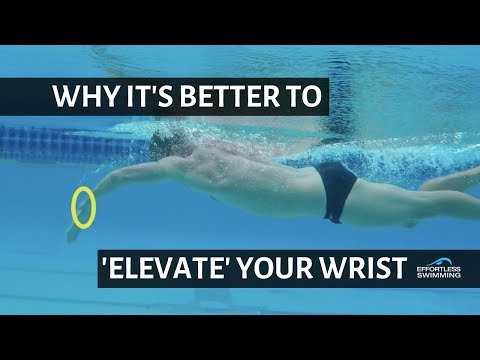
Basically what we talk about there is with all the swimmers that we’ve worked with, with the thousands of swimmers that I’ve personally coached and done analysis with, with the really good ones, there’s pretty much four key positions that you want to move through in the catch in the pool. So through this here. The first one is the start of the catch, which is what we just looked at. Fingers below wrist, wrist below elbow. Second position is the end of the catch, which we sort of call the high elbow position. Now have a look at that video to sort of explain that more. But when you finish the catch, we basically just want to get the hand and the forearm angled back in that direction there.
The third position that we like to sort of move through is the power diamond. So when we’re looking side on, and I credit any [inaudible 00:09:34] to this, is we want to see your shoulder, elbow, and hand roughly aligned underneath the shoulder there. That means it’s a lot more surface area pressing back in that direction, compared to if that hand is too far out in front. So you can see that that’s where it’s pressing. We want to try and really just get everything lining up pretty much underneath the shoulder there. Then the exit, we want it to exit just past the hip, in most cases there. So he’s doing a pretty reasonable job exiting here.
So if we look at the front view with the catch here, with the sort of power diamond position, which is that third one, if we measured that as an angle, we want to see the angle is 100 to 120. Now you can see that angle’s correct, that’s 116 degrees. But the thing is, he’s dropping his elbow quite a bit when we look from the side. So if you are either being filmed or you’re looking at footage of yourself, that angle of 100 to 120 that we want as the hand’s about to pass under, make sure that you’ve got the side position right. So shoulder, elbow, and hand aligned because this can be quite deceptive there. Because you can have the right angle, but you can still be dropping the elbow.
One of the other things that I’ve come to find over the last couple of years and working with people is, when you’re trying to get, say a high elbow catch for example, if you try and overdo it or you try and go too shallow with the catch and if you’re thinking of a high elbow is up close to the surface at all, that’s going to throw you off. So, it’s going to make it a lot harder to get a good catch.
So what I’d recommend here for this swimmer when we’re looking from the side, is you can see on this right-hand side, okay, he’s coming through. Now from here through to there, you can see it’s a very dropped elbow position. As in, if we were to draw a line from his shoulder to his hand, that elbow is well below that line. So that’s what we consider dropping the elbow. Obviously the forearm is pressing mostly down there. If we can get his forearm and hand in a more effective position there to be pressing back, it’s going to help him a lot.
But yeah, what he’s going to have to do here is go a little bit deeper with his hand from here to here. So see how it’s just too shallow? Too shallow through there. So right now it’s moving in that sort of position. So if he was to get, let’s say a high elbow catch right here, it’s going to be a pretty uncomfortable position for that shoulder to be in. He’s probably going to have to be somewhere like that, in order to get a high elbow catch, just because of the depth of the hand.
Whereas if he was able to go a little bit deeper with the hand, let’s say his hand was down another five, yeah, maybe five to 10 centimeters lower, he’d be able to get this sort of more comfortable, oops. More comfortable catch position there, where it wouldn’t need to be as extreme. By extreme, I mean he wouldn’t need to have his elbow really far forwards there. So we want to try and make that catch position, on that high elbow catch position, very comfortable, very sustainable. But if you’re too shallow, it’s too hard to do. It’s nearly always going to cause you to drop the elbow there. So, he’d need to go deep with that right-hand side.
On this left-hand side, that one has much better depth, much better depth. We’d really just want to work on pointing those fingertips downwards a little bit more. See how they’re facing forwards? A little bit too long through here. So he’s really sort of pressing down in that phase of the stroke. We just want to work on just improving that, getting the fingers pointing down more, and obviously getting into a slightly more effective position there.
Now how would we go about it? What we teach now in clinics, what we teach now in online video membership and what we do at camps now, is the YMCA drill progression. So you may have seen the YMCA drill that we’ve had in a number of other videos. That is a great drill to basically work on these four key positions. So that’d be the first drill, and then there are two other drills after that that we do at clinics and we have inside our video membership. So, that’s really the progression that I find can be most effective.
The reason for that is it keeps things really simple. If you’re trying to improve your swimming and you’re trying to change a stroke, it’s very hard. I’d say it’s close to impossible for most adults to really improve their catch in their pool without breaking it down into smaller elements, without doing drills that help you refine and sort of give you the time and space to be able to make these changes here.
Because if you’re just swimming and you’re trying to improve this stuff, it can be very, very difficult to do. So that’s why we like to use drills, love them or hate them, they’re a really effective tool for learning some of this stuff. But they’ve got to be specific and they’ve got to just allay to change that muscle memory and develop the motor patterns that we’re trying to establish there. So you don’t need to do a lot of drills, you just want them to be specific and relevant to the things that you’re trying to work on.
Now, if you’re not sure what you should be working on, then have a look at our five core principles of fast freestyle, that will give you the order of things to work on. So with these five core principles, what we typically find there is if you follow that progression and the very first thing is his breathing. You want to breathe deep and relax. If you follow that sort of process, for most people that is going to sort of tick all the boxes and help you develop in the right progression. Because there’s no point in trying to work on say your catch and pull if you can’t make it more than 50 meters in the water.
It’s more than likely going to come down to your breathing, might come down to your legs or your balance in the water. So follow the right order, and that’s the best way to improve. So have a look at the five core principles of fast freestyle, if you’re wondering what order should I work on things.
The other core question that I got asked this week was if I’m a coach, how can I learn to analyze people’s stroke? We’ve got this 10 minute video inside the video membership, where I talk about every single aspect of the strike that we look for. So when we run clinics, we normally film from four or five different angles, and I’d point out all the things that we look for and all the correct things that you generally want to achieve there in those different angles.
So if you are a coach and you are wondering, “All right, how could I do this stuff with my own swimmers?” Have a look at that 10 minute video inside the video membership and that’s basically how we break it down.
So thanks very much for watching. If you are not subscribed yet, please subscribe. If you do enjoy the video, please share it with someone that you know is trying to improve their swimming. I’ll be back next week with another Feedback Friday.