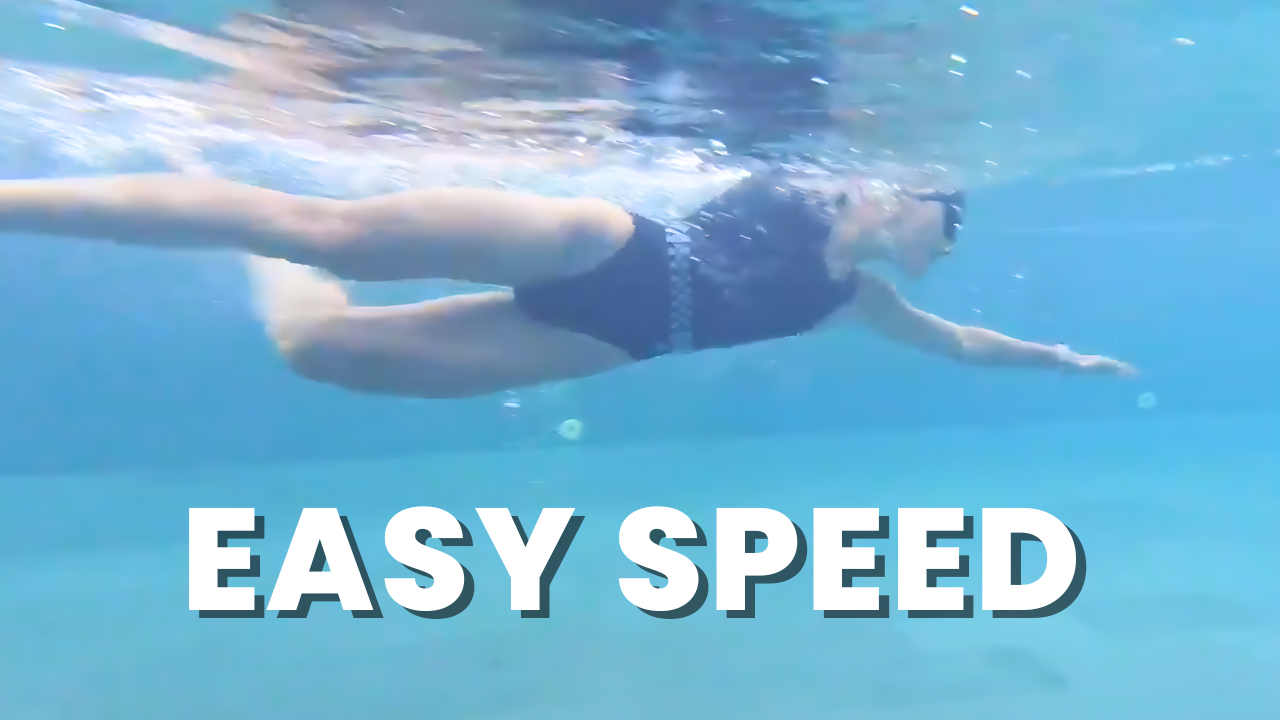

Front quadrant freestyle is what most elite distance swimmers use. It’s a great way for most swimmers who are new to the sport to learn as it helps with balance, breathing, and timing. At clinics and camps, we see a number of faults in the stroke that make it difficult to swim front quadrant. In this video, we’ll show you what they are.
Transcription:
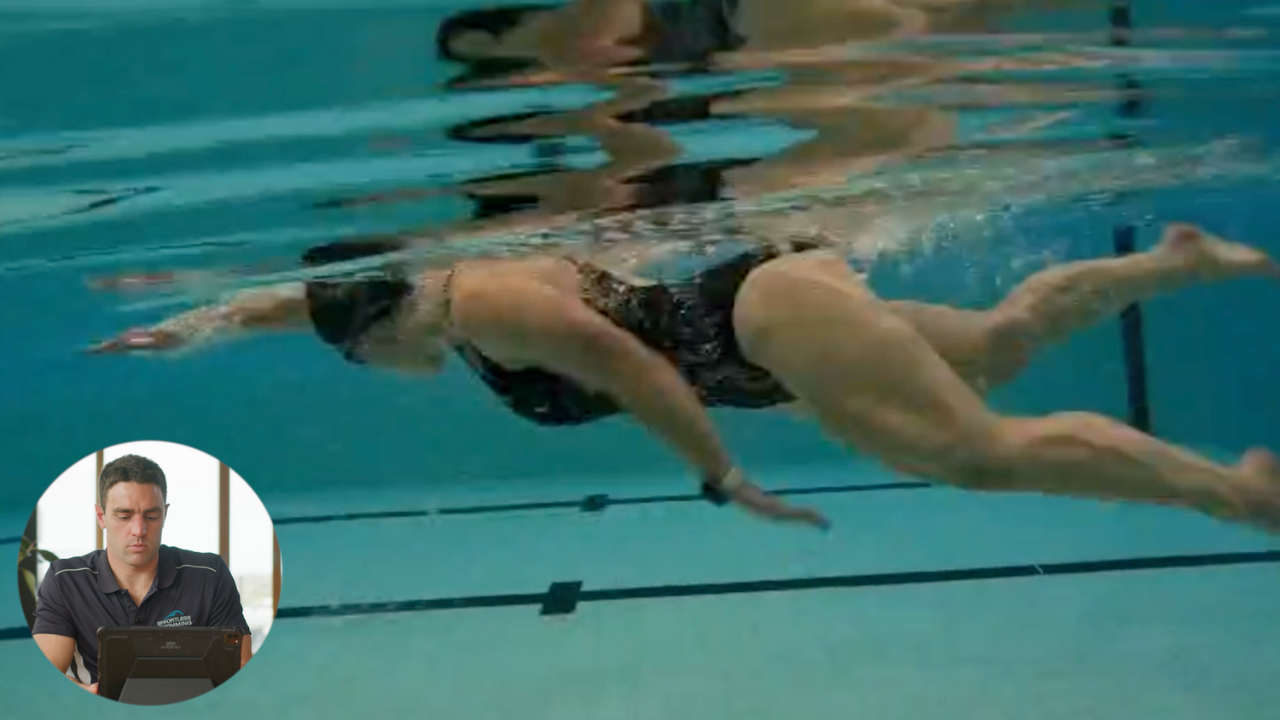
If your arms are pretty much straight, so there’s very little bend in them as you’re passing underneath the body, you’re probably going too deep and too straight. Now the problem with that is, and the way it can throw off your front quadrant timing is…
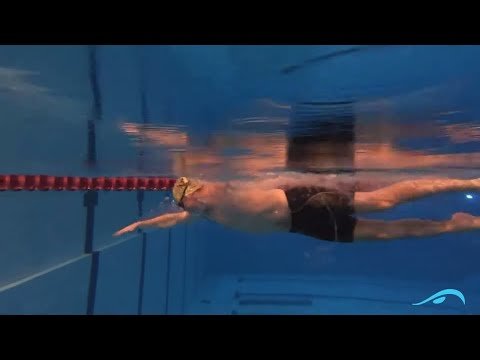
Hi, Brenton here. In today’s video, we’re going to look at a front quadrant freestyle stroke. Now you might’ve heard the phrase before. If you look above someone swimming, bird’s eye view, break it down into four quarters, we always want to try and have one hand in that front quadrant there. That’s a front quadrant freestyle. Now with most elite swimmers, you’ll find that they are front quadrant. Now, the exception there, sprinting 50, 100 meters, Sometimes they’re not front quadrant. And some distant swimmers aren’t front quadrant, but most of the time people will be front quadrant with their freestyle. So always one hand or an arm out in front of their head at all times. Now when we run clinics, we often find that about a third of the people there aren’t front quadrants, so we generally want to try and develop that in their stroke.
Now, the reason for that is it is one of the best ways to keep your heart rate down, swim comfortably, have good distance per stroke, and have overall good timing with the rotation and the catch and coordinating everything together. So a front quadrant stroke is typically what we want to aim for, especially if you are newer to the sport. If you’ve only been doing it for one, two, three years, you probably want to aim for a front quadrant freestyle stroke.
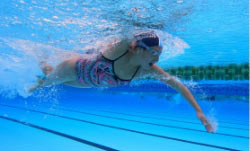
Now there’s a number of things that we often find makes it difficult to be front quadrant. The very first one is the entry position, so when you’re coming over the top in freestyle when you go to enter, we want to try and have the fingers going first, so your fingers entering first with the elbow up. It’ll make this triangle sort of shape with the arm. We want to enter in that position because then it’s so much easier to extend and reach forwards in the water at shoulder depth there. Now what we often find happens there that makes it hard to be front quadrant, is you’ll come over the top overreach, you’ll be fully extended above the water and then the elbow will typically land first and the hand and the wrist and the palm will be last. That causes you to push straight down on the water and causes the hand to pull through too soon to be front quadrant. So the first thing we want to try and get right is that entry position.
Now let’s say that you are overreaching on top of the water. What we typically recommend to change that, there’s a number of drills, but the one that I like to use with people is 6-1-6 drill. So you do six kicks on one side, take one stroke, swap sides. Do that drill with fins on and a snorkel on. Now the reason for the snorkel takes the breathing out of it. That way you can focus only on the thing that we want to focus on. So 6-1-6 drill with fins and snorkel. And as you’re coming out of the top of the water, the aim is to get those fingertips in first, but if you’re used to overreaching, you’re going to probably have to make it feel like you’re entering super early compared to what you’re used to doing. So have that entry, go fingers first, but it might need to be exaggerated.
Feel like you’re going really early, but when you go to extend forwards in the water out in front of you instead of above the water, it’s going to feel very foreign compared to what you’re used to doing. So you may need to feel like you’re going quite deep with your hand and just get used to that awkward and uncomfortable feeling of extending in the water if you’re not used to it. Now for whatever reason, people tend to make that change and then they’ll extend forward and they’ll be very close to the surface of the water if they’re not used to it. Just because that’s where they feel most comfortable.
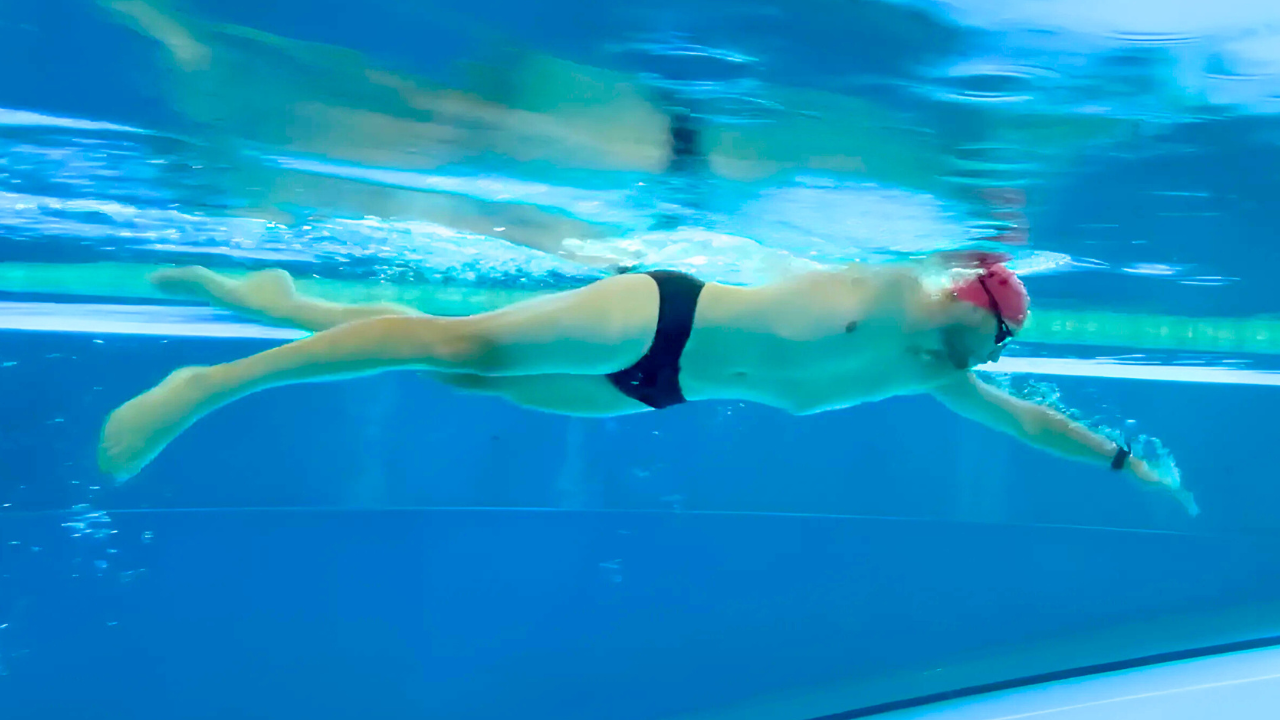
But we want that reach phase to be at about shoulder depth. You’ll see that with most of the best swimmers. It’s about shoulder depth, sometimes a little bit higher, but that’s the position to be reaching forwards in because that will create the least amount of drag and resistance when you are extending out in front there. So number one, make sure you get the entry position right, which is fingers first, elbow up. You can use the 6-1-6 drill to help with that. Then we want to make sure we have that reach phase in the water. Now it’s counterintuitive to what you think would be fastest. You’d think you’d be better off to just enter the water, start the catch, start the pull straight away because that’s the propulsive phase of the stroke. But the thing with that is when you’re reaching and extending forwards in front of the shoulder, that is when you’re in the smallest possible space. That’s when you are most streamlined in the water.
So you want to make use of that nice and efficient position there. So you’ll see that with all the best summers, there’s that reach out in front of the shoulder while they’re rotating their hips, rotating their shoulders, and pressing back past their hip there. So you want to make use of that part of the stroke instead of going straight into the catch. Now even if you’ve got a high stroke rate, let’s say you’re up in the 80 to 90 stroke rate. Yeah, you’re not going to spend long in it, but you’re still going to spend that little bit of time in that reach phase there. So I know a lot of coaches will sometimes talk about, you should never glide in freestyle, get straight into it, but there’s still going to be that element of extension out in front there, so while we don’t want to completely stop and pause, you’re still going to reach.
There’s a lot of nuance with all of these things. So that’s why I find just to see what works best for you and don’t take anything or any, I guess, phrase as that’s the way to do it for everyone. There’s a lot of nuance to a lot of these things and that’s why I try to go into a little bit of detail with them, so you have a better understanding of them. So we want to make sure we get the entry right.
Secondly, we want to make sure that we’ve got the reach phase out in front of the shoulder. That’s shoulder depth there. Now along with that, you need to make sure you’re rotating through the hips and through the upper body, the correct amount. What we normally teach, rotate to 35 to 45 degrees, sometimes a bit more, sometimes a bit less, but 35 to 45 degrees through the hips and through the shoulders as you are reaching forward. So I like to sort of combine that. That’s the reach and rotation phase of the stroke. It’s in that phase of the stroke, that’s going to then allow you to keep your hand out in front a little bit while the other arm starts to recover over the top of the water, which will give you that front quadrant timing.
Now, what we will often find there is if you don’t reach and rotate and you just extend out, you’re probably going to start the catch a little bit too soon. So use that reach and rotation together to allow this arm to just be reaching forwards and this arm to start to recover over the top to give you the timing. Now if you know that you’re too flat when you swim. Let’s say you’ve got 15, 20 degrees rotation through the shoulders, so too flat. A good drill you can do there is slid and glide drill. You might’ve seen this in a previous video, where we’re just looking to isolate that part of the stroke, the reach and rotation. So I really like the slide and glide drill for that, because we’re just working on that alone, reach and rotate.
So that’s a good one to do if you know that you’re too flat. Now the flip side of that is you might be over rotating, especially when you breathe. A lot of swimmers will tend to rotate their shoulders and their hips too far when they go to breathe. So they sometimes will get all the way onto their side to 90 degrees, but it’s too far. That puts too much pressure on the shoulder to be able to keep the hand out in front long enough, and it will typically cause you to press straight down on the water. So what we want to try and do there is just make sure that we bring it back to about that 45 degree range with your upper body rotation that’s going to allow you to keep the hand out in front there a little bit longer, and it’ll give you stability and balance when you’re going to get that breath.
So if you ever feel like you’re on this treadmill that you can’t get off, like the arms are going and you’ve just got no point in time where you can actually feel like you’re resting or you can keep your heart rate down, it’s probably because you’re not front quadrant. If you can slow it down out in front of you through the reach and through the catch phase a little bit, that will allow that timing to come in. And that is what is going to make your heart rate stay down. It’s going to make it feel a lot more comfortable. In our previous video about the base position, it’s kind of that position that we’re talking about. That position where you can feel like you’re comfortable and relaxed every single stroke there. So that is the base position or the position where we were reaching forwards.
We want to make sure we get the entry right. We have that reach out in front of the shoulder and get the right amount of rotation at that point in time. The other thing we want to make sure that we have with the arm is it’s in the right starting catch position. So we teach the four key positions through the catch and pull that we want to achieve. You’ve got the starting catch position, the high elbow catch, the power diamond, and the exit. Now the starting catcher position is subtle, but this will make a difference. It’s you want your fingers below your wrist, wrist below your elbow as you’re extending forwards. Ever so slightly. It doesn’t need to be much, but just ever so slightly. It’s pretty common to see people just drop the wrists so they’re extending like this or to really drop the elbow a lot.
Now, what tends to happen there is if you’re extending forwards in that position, you’re probably going to just be drifting down and pressing straight down. Because of the angle of the hand and the arm, it just forces you to do it. It’s a lot harder to keep it reaching forwards. So have that really subtle, slightly downwards angle from the fingers, wrist, and elbow as you’re extending forwards there and that will help you keep the hand out in front of a little bit longer.
Now we often teach the front kick drill or the side kick drill there to just get a sense of where the hands are. And a good way to check it is just look forward when you’re doing those drills. Make sure you’re in the right starting catch position and that is going to allow you to make those adjustments if you’re not in it. Because again, when we run clinics, we have a lot of people who do clinics and at camps quite often with about half the people, only to make these little corrections with them. They’re 1% changes, but it’s sometimes those 1% changes that make a difference. So just look forwards, check your position, make sure that the fingers aren’t coming up or the elbow is dropping. It’s really common. And what you think you’re doing is very different than what you’re actually doing a lot of the time. So that’s why it can be good to check in on each of these things. So entry, extend forwards out in front of the shoulder, get the right amount of rotation through the hips and the upper body. As you’re reaching forwards get that hand in the right position with fingers below wrist, wrist below elbow.
Then the other thing that you’ll probably need to do there, make sure you’re slowing it down through the reach phase and the catch phase. So your timing in your stroke should be slow to fast. It’s not this constant speed that the arms are continually moving through it. Even with like a sprint sort of stroke, you’re going to be slowing it down a little bit in the reach and the catch phase of the stroke. It’s that slowing it down through the reach and catch phase, that’s going to give you enough time for the other arm to start recovering through and to come out in front, so you will keep that front quadrant timing. The analogy I like to use here, and some people have said that this has been helpful for them, is pretend like there’s mud out in front of you. So the mud is a little bit thicker than water. It’s going to take a little bit longer to travel through with your arm than it would be if it was water there.
So if you look at the timing here at these swimmers. You can imagine that mud is out in front of them. It’s a bit thicker. It’s taking them a little bit longer to travel through. And that’s the timing that you typically want in your stroke. So if you find that your heart rate just skyrockets and you feel like you’re on this treadmill that just can’t be got enough of, then you may find it’s helpful just to think of that mud out in front, slow it down through the reach phase and the catch. Not only will it keep the heart rate down, not only will it help you with your front quadrant timing, but it is also going to help you with your catch and pull, because that’s actually going to give you a lot more time to set up a high elbow catch position and to then keep pressure and maintain pressure on the hand and forearm as you’re going through. So it helps with a lot of other aspects of the stroke.
So if you’ve got all of those things in place, the last thing I’d check in with and make sure that you’re doing right is that you’re not going too deep and too straight with the arms in the catch and pull. So if we look front on it, you swimming towards the camera, if your arms are pretty much straight. So there’s very little bend in them as you’re passing underneath the body, you’re probably going too deep and too straight. Now the problem with that is and the way it can throw off your front quadrant timing is that when you’re really deep underneath the shoulder there, the hand and forearm as it’s coming towards the hip will often be coming up towards the hip. And if we want to move forward, you’ve got to be pressing back with your hand and forearm most of the way.
But if you’re too deep, the hand and forearm will be coming up towards the hip and that’s just going to push your hips down and your legs down. So we want to try and make sure that we have that, you might have seen it in a previous video, it’s like a light globe shape on the side. We want to try and make sure that the hand and the forearm comes a little bit shallower through the back part of the stroke. So we just need to be at the right depth when we’re going through the catch and the pull. So it’s not down really deep with where the arms are completely straight. In that power diamond phase where you usually want to see that 100 to 120-degree angle, so the elbow is out to the side, hands a little bit shallower and that can help you get to the right depth there.
So it’s a little bit to cover there. But follow that order, follow that progression because if you don’t get it right at the start, if you overreach on the entry, that’s probably going to be hard to correct those other things. So that’s why we like to start in the right order and follow those progressions in that sort of order. So we’ve got a finger first entry, elbow up, slide the hand forwards out in front of the shoulder, use the 6-1-6 drill to develop that and correct it, and wear fins and a snorkel. Then after that, we want to make sure that we have the right reach and rotation. So as you’re reaching forwards, hand in the starting catch position with fingers below wrist, wrist below elbow. And then as you’re rotating, hips and shoulders will be about 35 to 45 degrees rotation to the side. Not all the way onto the side there.
So slide and glide drill can help you develop that part of the stroke there. Then after that, we need to make sure that you’re slowing it down through the reach and the catch phase a little bit more than what you would do through the rest of the stroke. So you will eventually, you will gradually build up the speed through your catch and pull, but it will be a little bit slower out in front. So it might feel like you are kind of gliding a bit, and there’s nothing wrong with that. I’ve seen people talk about it. You should never glide in freestyle, but there’s so much nuance to all these things that you’re still going to spend some time at reaching and extending out before you start the catch. So give yourself that time, as you can see with the swimmers that we’ve looked at in these videos.
Then after that, just make sure you’re going to the right depth, through the catch, and through the pull-through. Because if you’re going too deep, you’re probably going to be pressing up towards the hip. It’s gonna cause you to get a little bit stuck at the back, and then it’s just too hard to get the arm out and over while the other hand is out in front there. So that’s the progression that we would normally go through. So I hope you enjoyed today’s video. And if you’re not sure whether you’re doing a front quadrant stroke, the easiest way to check is just get someone, a friend, get a camera record you side on or ideally above, but side-on. And when you slow it down, there should be one arm or a hand out in front of the head at all times. Only needs to be slightly, but there should always be something out in front there.
So please like and subscribe if you did enjoy this video. Leave a comment below. Let me know if you think you’re front quadrant at the moment or is this something that you need to work on. And out of those drills, is there a drill that you think would be helpful for you? So thanks for watching. If you are looking to improve your swimming, you can check out our video membership. That’s where we have all of our step by step process to swim faster, swim more efficiently, and basically just make your swimming a whole lot more fun when you’re swimming faster and easier. So we’ve got our step by step progression in the video membership. It’s only $55 a year. Check that out in the link below. Thank you for watching and I’ll see you next week.