
In this video, we analyze a swimmer with good balance, rhythm, and style. What can he change in his technique to swim faster?
1. Reduce upper body rotation on his breathing strokes
2. Avoid the fingers rising to the surface after entry
3. Increase stroke rate by 5-10%
4. Avoid hands drifting outwards during the catch
5. Close his fingers a bit more to reduce the gap
At the end of the video, we show the drill that we recommend he use to improve his catch.
Transcription:
We generally want to try and keep this hand on the inside of the elbow. So here, if he can keep that hand on the inside of the elbow, it’s going to help him use his lats a lot more effectively through this part of the stroke. Because when that hand goes wider, it’s genuinely a weaker position.
When we run clinics, one of the things we do is we get people to push down in that position, see how much power you’ve got when your arm is there, see how much power you’ve got when your arm is across the center, and see how much power you have when your hand is on the inside of the elbow. With those three different what we call power zones, you’ll find that this is always the weakest position when that hand goes wider than the elbow.
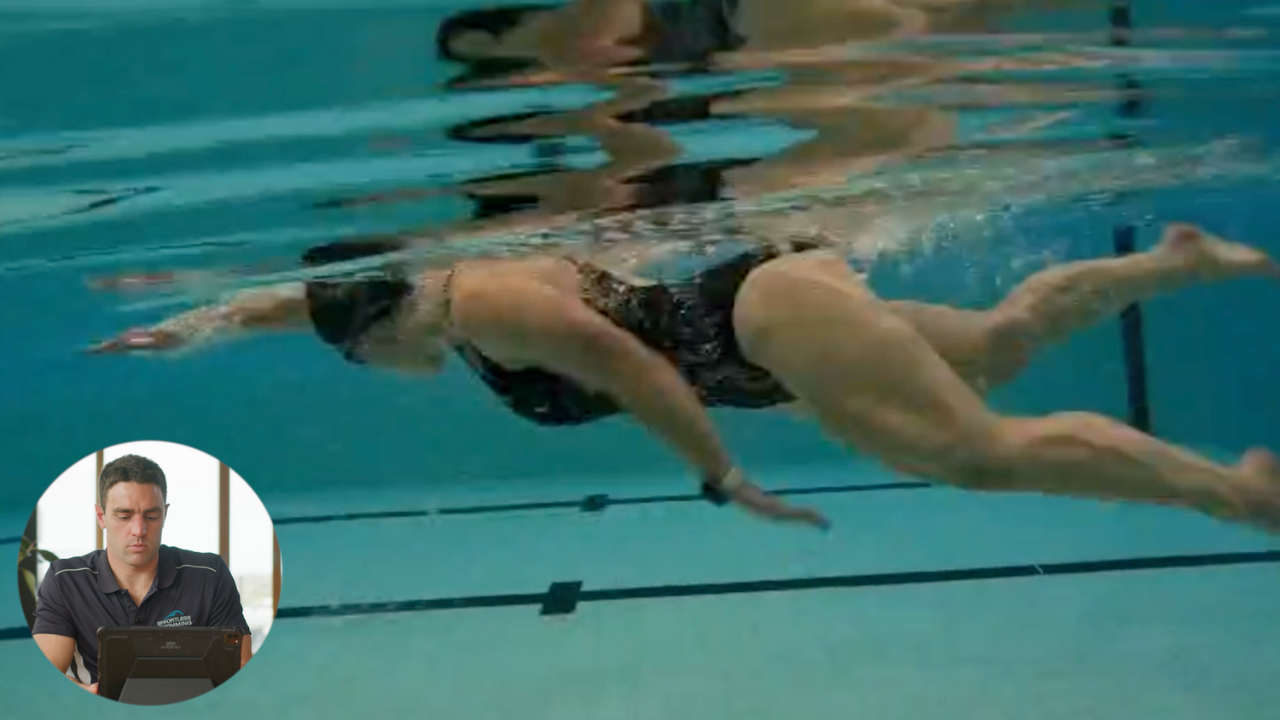
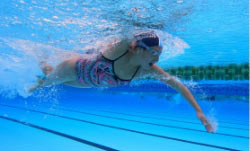
Welcome to Feedback Friday. In this episode, we’ve got a swimmer who is swimming around the 1:20 to 1:25 mark in these videos. So swimming well, and you can see that this swimmer’s got great style and balance in the water here.
Now let’s have a look at some of those things that this swimmer could still improve on to continue to swim faster. The first thing that stands out to me when we look from the front view, which I’ll skip to now if we have a look from the front view when he takes his breath right here, he rotates the shoulders a little bit too far. In terms of how far should you rotate your shoulders, really we want to see it 35 to 45, maximum really 50 degrees if you look at that shoulder rotation with the water. So he’s going pretty close to 90 degrees there.
Now you’ll see what does happen on those strokes, and we’ll cut to this underwater view to show you that. So when he does get the breath there, you’ll notice that that leg here bends a lot, gets close to a 90 degrees bend or 100 degrees. That’s really going to increase the drag that is created on his legs there, and the legs are tending just to splay a little bit. But it’s more than the bottom leg, the knee’s bending a little bit too much.
Now the reason that it often does that is it’s partly it’s a counterbalance to that large amount of rotation through there. But the other thing as well as you’ll see that on that breathing stroke, the hand sometimes has a tendency to pause, to stop moving for a little bit. So out in front there, you’ll see it sort of just hovering up there for what looks to be about not a huge amount of time, 0.2, 0.3 of a second there where it’s kind of just paused there. When there’s that deceleration, when there’s that pause out the front, then the leg really wants to keep that momentum going. So you end up sort of having a big kick there. There’s nothing wrong with having a big kick there, but we don’t want the knee to bend too much.
So the first thing that this swimmer could do is on those breathing strokes, reduce the shoulder rotation. Maybe reduce the hip rotation a little bit, and just keep that hand moving out in front because it does look like … Yeah, he does just rotate that a little bit too far, which creates that extra bit of knee bend.
What that will also help him with is increasing the rating, increasing the cadence a little bit from where he currently is, because this is obviously a really good style. When he’s looking to increase the speed, one of the things he could do there is increased the stroke rate a little bit. Obviously, it depends on what distance the race is, what effort you’re looking to put in. But that would be another factor that’d be worth considering there. But as you can see, a really good style.
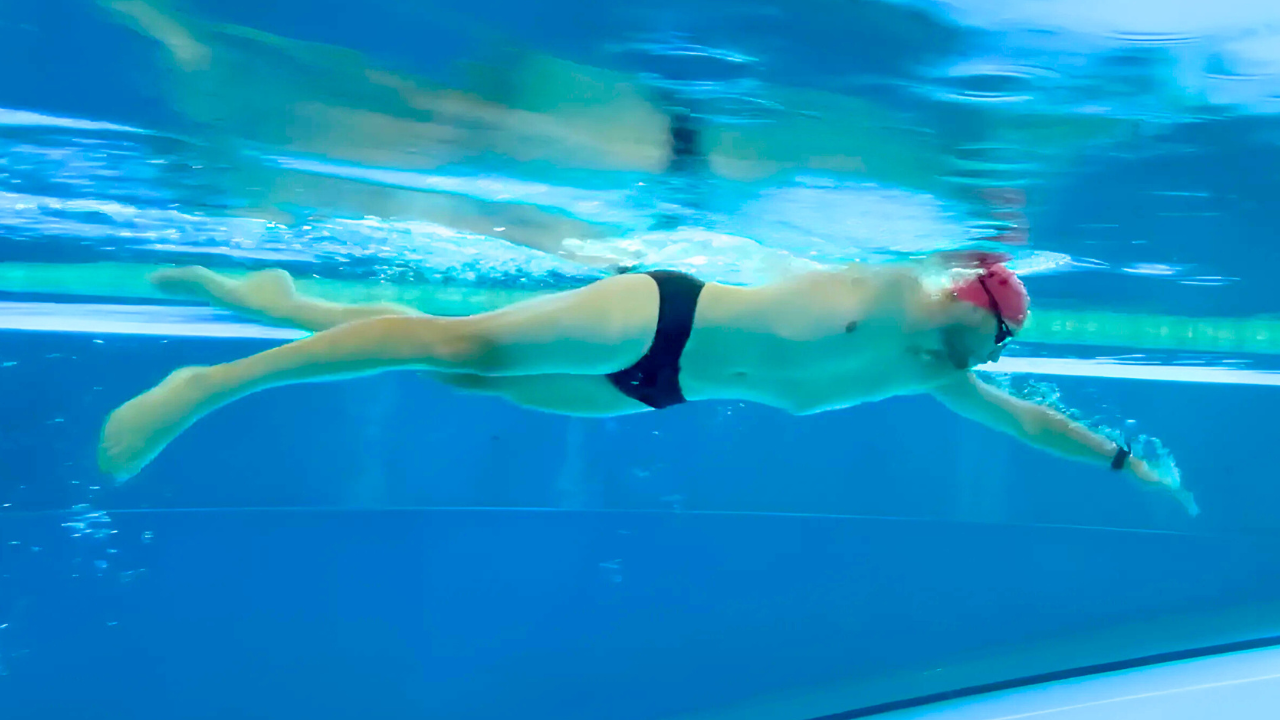
Now the other thing that I’d look to do is just adjust the height of the hands. You can see the right hand has that tendency just to drift up a little bit. It’s not a huge amount; but overall, he’ll be better off getting those fingertips a little bit deeper so the fingertips get to underarm depth a bit sooner so that the fingertips aren’t higher than the rest of the arm. Because it does increase the drag there, and you can see it happens a little bit on this left-hand side, too. That hand is quite high, and that drag is going to be created there. So overall, he could get the hands just a little bit deeper, but mostly it’s the arm that he’s leaning on to breathe. So this arm here, that’s the one that has the tendency to rise up. So he’d want to get that down to shoulder depth a little bit sooner there.
So there’re two tweaks, two adjustments that this swimmer could make to swim faster. Now let’s have a look from the front because there’s a couple of things that he can do with his catch and pull that will also help here. This position is a great, really nice position to start the catch in. You can see that from a drag perspective, not much he could do there to minimize the drag. That looks really good. The hands in line with the shoulder, good depth on this position.
Now as he goes through this part here, you’ll notice that he does a pretty good job of setting up the catch. The hand does go a little bit wide. So right now, that hand’s gone wider than the elbow, and we generally are want to try and keep this hand on the inside of the elbow. So here, if he can keep that hand on the inside of the elbow, it’s going to help him use his lats a lot more effectively through this part of the stroke. Because when that hand goes wider, it’s generally a weaker position.
When we run clinics, one of the things we do is we get people to push down in that position, see how much power you’ve got when your arm is there, see how much power you’ve got when your arm is across the center, and see how much power you have when your hand is on the inside of the elbow. With those three different what we call power zones, you’ll find that this is always the weakest position when that hand goes wider than the elbow. So we just want to avoid that little bit of drift out with the arm, get that hand on the inside of the elbow a little bit more.
Finishes off pretty nicely. Could close the fingers up a little bit. I don’t focus on that too much. But yeah, a bit of separation’s fine, but there’s probably a little bit too much. There’s too much of a gap there between the fingers there. So he will be slipping a bit with the hand.
On this right-hand side, again, you’ll see that right-hand goes wider than the elbow as well. Let’s check it on the other stroke because I want to make sure that we’re getting that right. Yeah, it does go a little bit wide. So from here to here, that hand is just moving away from the body a little bit too much. While this angle looks pretty good with the arm, you can see it’s 123 degrees. Pretty close to the 100 to 120 degrees that we want. While the angle’s quite good, he’s just a little bit wide from the body.
What he’ll be better off doing is going down a little bit more under the body with that hand. He can even keep the upper arm there if he wants, but just bring that hand on the inside a bit more. Or he could just look to have a bit more of this triangle shape on the side, like a half diamond shape there. Because when that hand comes a little bit more under the body, that direction of force is going to be a little bit more effective. Instead of being out here, it’s going to be a little bit more directly under the body, so it’s going to help him move forward a bit easier. Plus, you can generally be a bit stronger when the hand comes a little bit closer in.
What we kind of want it to feel like is that you’re moving through the catch, you’re anchoring that hand, that forearm in the water, and you’re moving your body past it. In an ideal world, that’s kind of what we want it to feel like. Whereas if you go too wide with the arm, it can sometimes feel like you’re really pulling yourself forwards in the water instead of anchoring the hand and driving your body past it. So he could come under the body a bit more there. Then obviously on that left arm is the one that we want it to be a little bit closer in as well.
Now in terms of drills, I think the YMCA drill would be great for this one. If you have watched any of this Feedback Friday videos, we talk a lot about the YMCA drill and those other drills following it in the progression that we’ve got inside the video membership there.
But the reason that I always talk about these drills is, these are drills that I’ll do a video on soon actually. These are drills that we made up, we came up with, but they have been really effective for helping people change their catch and their pull. That’s why I always talk about them. There’s a lot of drills you can do to improve your catch, the path of the hand, all these things that we talk about. But these are fine for swimmers who don’t necessarily have that swimming background from a young age. If you find that you don’t really have a great feel for the water, these are the simplest, most effective drills that you can do to improve that part of your stroke. Because it’s quite a complex movement, there’s a lot going on there. You’ve got your rotation, you’ve got your kick as well to think about.
The reason these drills are so effective is because it just keeps it really, really simple, and it helps you focus on the most important aspects of the strokes. So that’s why I always recommend or refer back to these drills, is because I’ve found it to be most effective, especially for swimmers who don’t necessarily come from that background of swimming. You can see those drills inside the video membership, which I’ll provide a link to below.
Thanks very much for watching. If there’s something that you spotted in this video that you think could be worth adjusting or working on, let me know in the comments below. Like to hear from you. Also, like and subscribe. If you haven’t subscribed yet, then please do so. If you hit that notification bell, then you’ll get notified every time we add a new video. We add two videos a week. We typically do a Feedback Friday and a video talking about a different aspect of the stroke. So thanks again for watching, and I’ll see you next week with another video.
YMCA drill helps you get a feeling for the four most important positions to move through in the freestyle catch and pull.
The first position is with the arms out in front of you, and this is where you’re going to start the catch. You want your fingers lower than your wrist, wrists lower than your elbows, and elbows lower than your shoulders. Hold that position for four or five seconds.
Then move into the second position, which is the high elbow catch. Here the fingertips will be pointing down to the bottom of the pool, and your upper arm and elbow won’t have moved much from that first position. This is roughly where you want to get to with your arms as you are going through the catch in freestyle.
The third position is where the shoulder, elbow, and hands all align underneath the shoulders if you’re looking from the side. And if you’re looking from the front, they’re going to make this diamond shape. This is the power diamond that we talk about in freestyle, and this is when you are going to be really using your lats throughout the stroke.
The last position is near the exit, and this is where the hands will be next to the hips. The palms should be facing behind you in this phase of the stroke. To complete that, press back past the hip and maintain that propulsion. A lot of swimmers will let their palms face up to the surface, but make sure they stay back behind you. The elbows will have a little bit of bend in them. Because for you to get your arm out comfortably and easily, you’ve got to make sure that there’s a bit of bend there. So that’s a bit of a funny position, but it will help you get the handout and arm over the top a lot easier.
It’s called YMCA because your arms roughly make those letters as you go through it. So the Y position is with both hands out in front. The M is in that high elbow catch. And if you’re looking from the front, it looks a little bit like an M. The C is in that power diamond position. If you were to turn it on the side, it’s a bit like a C. And the A is roughly the letter that the arm will make in that last position there. So YMCA drill, one of the best drills you can do to change your muscle memory and get a feel for those four key aspects of the stroke and positions that you want to eventually move through as you go through the freestyle catch and pull.