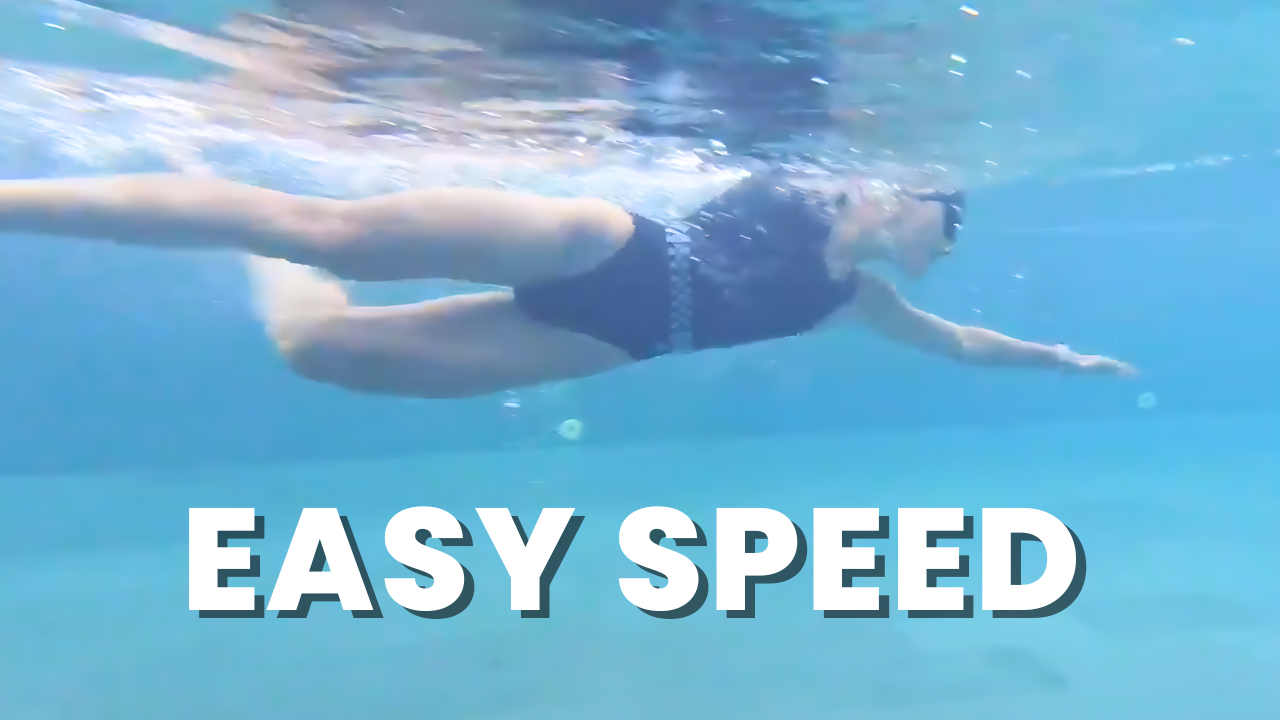

We have compiled snippets from our most popular videos on YouTube to date. Enjoy!
Transcription:
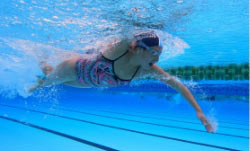
So there’s a couple of reasons why your legs will be sinking in freestyle. The first one and most common one is if you’re lifting your head to breathe or if you’re rolling around and looking to the sky when you take a breath. Because your head weighs about eight kilos and when you lift that above the water, then as a result of just pure balance, your feet and legs are going to sink. So when you take a breath, you want to make sure that you’re just breathing to the side and you’re not lifting your forehead up above the surface. So ideally you want to have one goggle in the water, at least part of one goggle in the water, and you don’t want to lift your head all the way above the surface because in swimming it’s all about balance. And when you lift your head up, your feet are going to sink. So make sure that you keep half of your head in the water when you take that breath and that way your feet and your legs will sit a whole lot higher.
The second most common reason is if you’re entering catch is pressing down on the water instead of tipping the fingertips down to press back on the water. So again, as a result of balance, if that first part of your catch is pressing down on the water with a dropped elbow, then as a result of that, just because of balance, again, your feet and legs are going to sink. So we want to make sure that when we enter and extend forward, the next phase of the stroke, we want to start to tip the fingertips down to the surface. So you’re starting to press back against the water and propel yourself forward instead of pushing down on the water like you can see in this video.
Another reason why your legs might be sinking in freestyle is if you’re holding your breath when you swim. So that can create extra buoyancy in your torso and your lungs, which can cause your feet and legs to sink down. So when you’re swimming freestyle, you want to make sure that you exhale when your faces in the water and when you go to take that breath, breathe everything out just before you get your breath.
The fourth one is if you have poor posture and bad connection through your core. So when we’re swimming freestyle, we want to swim tall where your chest is out, your shoulders are back, you’re drawing your belly button into your spine and you’re squeezing your bum cheeks together. And what that will do is create great connections through your core so that you’re firm through there and it’s not like you’ve got a wet noodle in the middle, all right? So that’s one of the other reasons.
The fifth reason is if you’re looking forward. So if your eyes are looking directly forward, for most people, that’s going to cause your hips and your legs to sink down. So again, it comes down to that balance. We want to make sure that our eyes are, for most people, either looking around 45 degrees or a little bit further down. Most people, it’s not straight down but just a little bit further forward of that. But if you’re looking directly forward, which is the natural thing to do, that can often cause your hips and your posture to be very poor.
And the last reason is if you are kicking from the knees, so you’re doing like a bicycle kick instead of keeping legs a little bit straighter and also if you have tight ankles where you’ve got poor ankle flexibility and your feet are pointing down to the ground instead of back behind you. So they’re the main six reasons that can cause your legs to sink.
So the three things that I find are probably the biggest ones here. Number one is the catch. You can see in the first video, as she’s entering and extending forward, the fingertips, the hands, the risks, they all stay very high as she’s extending out in front. What we like to try and get to is the position where the fingers are slightly lower than the wrist. The wrist is slightly lower than the elbow as you’re entering and extending forward. This allows you to start the catch. This allows you to start pressing back on the water a little bit sooner as opposed to pressing down on the water or putting the brakes on when those fingertips come up.
And so this is probably one of the biggest things that have helped her take off those 20 seconds because when someone comes to us and they’re doing this, it’s slowing them down so much. And when we go through some of the drills, like some of the sculling drills, some of the kicking drills, we get them to practice doing the right thing and the wrong thing. And the right thing is fingers below the wrist, wrist below the elbow. And they find out when they go through some of these drills in the wrong position, there’s so much drag, so much resistance created out in front.
So if we can just get you to enter and extend in that position there, with that nice long line out in front where you should feel the water coming just over the top of your fingertips when you’re extending out in front there. That sets you up so much better for the rest of the stroke. So that’s probably one of the most noticeable differences. You’ll see from the front position as well, that’s allowed her to get a slightly better angle in the catch. So when we look from the front, as she’s pulling through past her shoulder, we want to get to the angle where it’s around a hundred to 120 degrees with the arm angle, from if we take the angle from the shoulder to the elbow to the hand, that should be a hundred to 120.
So, not quite there yet, but much better than what it was originally where the arm is quite straight. So that as well as a very obvious difference there. The other thing you can see with her right hand as she’s finishing off the back of the pool. She’s finishing a long way from her hip in the initial video and now she’s finishing much closer to the hip, which is what we want. If you finish out too wide from the hip, it’s a much weaker position and it’s also not directing you straight forward. So I mean, picture yourself trying to pull yourself out of the pool with that wider position, you haven’t got quite as much power as if you are pressing back almost brushing that hip there. So, that’s the first one and most obvious one and probably where the biggest improvement has come from.
The second thing is the alignment. So in terms of alignment, we like to look from the top, so the bird’s eye view. And here we like to use the analogy of swimming on a set of train tracks. So picture you’ve got a set of train tracks in line with each ear or your shoulders and every time you enter and extend forward, you’re following those train tracks. It doesn’t mean that you pull straight through and follow the train tracks on the pool. It’s just when you enter and extend forward. You can see in the original video, she was coming across the head, so quite a bit of crossover and then sweeping out very wide, on both arms.
Now on the most recent one, yeah there’s still a little bit of that out sweep the hands drifting out the touch, but no way near as much, especially on that right one, so much better and left isn’t quite as much as before. But that right one is noticeably different and you can just see through the body as well, there’s much less drifting of the hips out to the side and bend and talking through that body. So she’s managing to keep her body line much more stable and still and that nice and stable, core and body. That’s what gives you the ability to kind of apply pressure in the water because if your hips and your body is moving side to side if that’s snaking, it’s much harder to generate as much propulsion in the catch and pull through.
So let’s have a look at how you should breathe in freestyle. Now, the first step after you turn your face back in the water once you’ve got your breath is to make sure that you gradually exhale through your nose. If you gradually exhale through your nose, then you’re just going to be very comfortable and relaxed as you’re swimming and going through your stroke. Now, I don’t want you to exhale much, but just a little bit and have a look at that in these videos. Here you can see how both swimmers, there are a few examples here, both swimmers are actually exhaling just a little bit through their nose. That’s step one. Then, what you’ll see that the best swimmers is in the world do, just before they turn the head to breathe, is they have quite an assertive or an aggressive exhale. They blow out through their nose, through their mouth, they get rid of all the air in their lungs so that by the time their mouth actually exits the water, they’ve got empty lungs and it’s like a vacuum. It just naturally fills up once they go to breathe.
Now the mistake that a lot of swimmers make that cause them to run out of breath is that they actually hold on to that air for too long and they don’t empty their lungs just before they turn to breathe. Or the other mistake that they’ll often make is they breathe everything out too soon so that they end up taking one or two strokes with nothing in their lungs with no air and they end up getting tired that way. So they either do it one of two ways. So the solution there is a gradual exhale through the nose and then breathe everything out quite assertively just before your mouth exits the water
Catch, if you don’t know what that is, it’s basically from this position where you’re at full extension down to about there. That’s all it is. That’s what the catch is. So when you hear a coach or someone else talking about the catch in freestyle, it’s just that part of the stroke. And the best way that I like to think of it is it’s all about setting yourself up in a high elbow position. And all that means is if we draw a line from your shoulder to your fingertips in that part of the stroke, as you can see there, the elbow should be in front of that straight line. That’s a high elbow catch. Most swimmers tend to be either too straight with it or they’re dropping the elbow. That’s very common to see. But if you can begin to keep that elbow somewhat forwards, it will make a big difference with how much water you’re holding in stroke.
So when it comes to the exit phase of the stroke, when the hand’s coming out of the water, the two things I like to keep in mind are number one, we want the forearm and the hand to be pressing back against the water. When you’re pressing back on the water, that’s going to move you forwards. The second thing I want you to think about is you want to be able to come out of the water in a way where, it’s almost like when you finish that exit from the water, it’s moving straight back into the recovery in a very relaxed rhythmic manner. If you get caught up out the back of the stroke, then you’re probably going to find it quite hard to come over the top.
With the stroke rate, that would kind of be the next thing that we just want to adjust slightly. So with his stroke rate, he’s around 50 strikes per minute at the moment, maybe a little bit slower towards the end here. For this athlete, I’d be aiming for at least a 55 possibly 60 strokes a minute as he’s going at race pace or when he’s swimming fast because if your stroke rate’s too slow, then you don’t quite get enough momentum through the stroke to be able to keep the hips up and the legs up. If we increase it by 10 or 15% that’ll give them a better chance at keeping a more horizontal body position, which is going to increase his speed just by reducing the overall drag through the body there.
Hi, Brenton Ford here from Effortless Swimming. In this video, I’m going to show you how to make sure you’re not over-rotating when you swim freestyle. Because over-rotation kills your speed and your power when you’re swimming freestyle. When we look front on at a swimmer, we’re looking for a rotation of 35 to 40 degrees when we take the angle from the shoulders through to the surface of the water. Occasionally the swimmer will rotate to around 45 degrees when they take a breath, but if you rotating more than this, then you’re more than likely over-rotating.
Occasionally we see swimmers rotating up to 90 degrees through the shoulders, but it’s very hard to have a strong catch and a strong pull through when you over-rotate and you rotate that far because it drops the shoulder and the hand down deep in the water where there’s not much power for most people. The way we stop swimmers from over-rotating is taking them through this little sequence, which is, first of all, having the right posture. So if you’ve seen any of our other videos, you’ll know that we talk about keeping your chest out, shoulders back, drawing your belly button into your spine and squeezing your glutes or your bum cheeks together a little bit. Not so that you’re really tense, but just so that you’re strong through your core and you’re tall through your body. So posture is the first thing.
The second thing is a drill that we go through, which is kick on your front with one arm out the front, one arm by your side, and you’re just breathing to the side. The reason this drill is really good to stop you from over-rotating is that swimmers who do tend to over-rotate will drop their hand and their shoulder very deep when they go to take a breath whereas this drill because you’re kicking mostly on your front with a little bit of rotation, you’re going to be a lot more balanced when you take that breath and you’re going to get used to not having to rotate all the way to 90 degrees to take that breath. So you can basically get your breath a whole lot easier and a whole lot lower than what you might be doing at the moment. We then tend to go into a single arm freestyle drill with one arm out the front and you’re pulling through with your other arm. And again, this just gets you comfortable with rotating a little bit less than what you might be doing at the moment.
The third thing is to check your width in terms of your entry and extension out the front. So when we look at freestyle, it should be hand entering in front of the shoulder or the ear and then extending straight forward. If you come across your head, it’s very hard to get a good catch on the water, but it’s also most likely going to cause you to over-rotate. So keep your hand in front of your shoulder or your ear as you enter and extend forward.
One of the most evident things you can see from the side here that’s going to help him improve is if we can just improve his alignment and get his feet a little bit closer together or his legs a bit closer together when he’s kicking. And when the legs tend to splay out wide like you can see here, nine times out of 10 it’s a counterbalance to what the arms are doing. So when you see someone whose legs aren’t kicking small enough, then it’s often what the arms are doing out in front. So if we look at the front view here, you can see that on the entry he’s coming here, his hand direction is coming across the center on entry and then he’s crossing the midline, so the middle of the head and then he’s kind of going out a little bit too wide and pulling underneath his body but in a very wide position there.
So that sort of side to side movement where he comes into the center and then out too wide, that’s causing the legs to splay out at the back. And when the legs splay out at the back, it’s an extra drag, extra resistance and we want to make it like we’re swimming down a very narrow corridor. So if we can just tighten things up a little bit, narrow things up so we can just fit into that smaller space like we’re swimming down a narrow corridor or a narrow hallway, then we’re going to be more efficient.