
The first thing you need to do to swim faster is to reduce drag. There are dozens of things that can be increasing your drag, but a few common ones we see when coaching.
1. Eyes too far forward – Leading to the hips and legs dropping
2. Knees too bent in the kick – Causing the upper leg to sit below the line of the hips
3. Hand rising during the reach phase – Leading to an increase in drag on the forearm and hand
How much quicker could you swim if you were doing all of these things, and then fixed them?
Transcription:
Welcome to Feedback Friday. In these videos, we look at someone swimming, we analyze their stroke, and we look at what can they do to swim faster. In this episode, we have a swimmer named Jerry who is training for swims that are around two kilometers, mostly XTERRA races, which are the off-road triathlons.
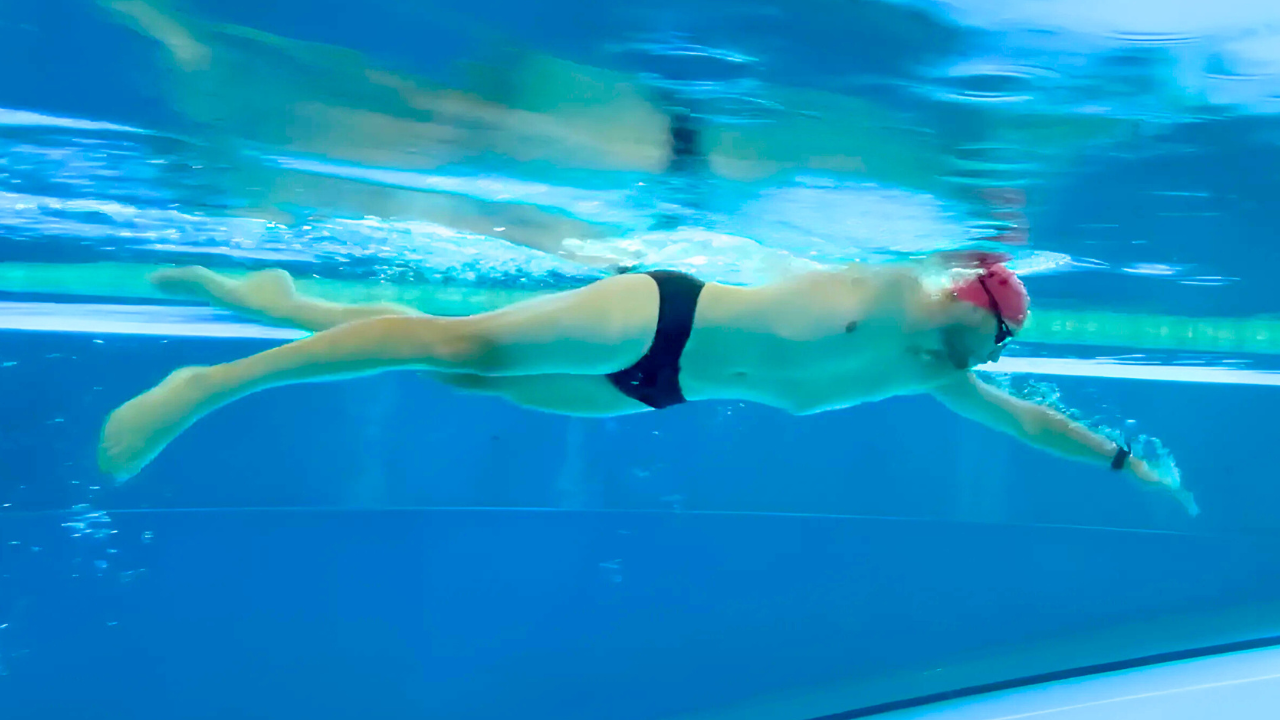
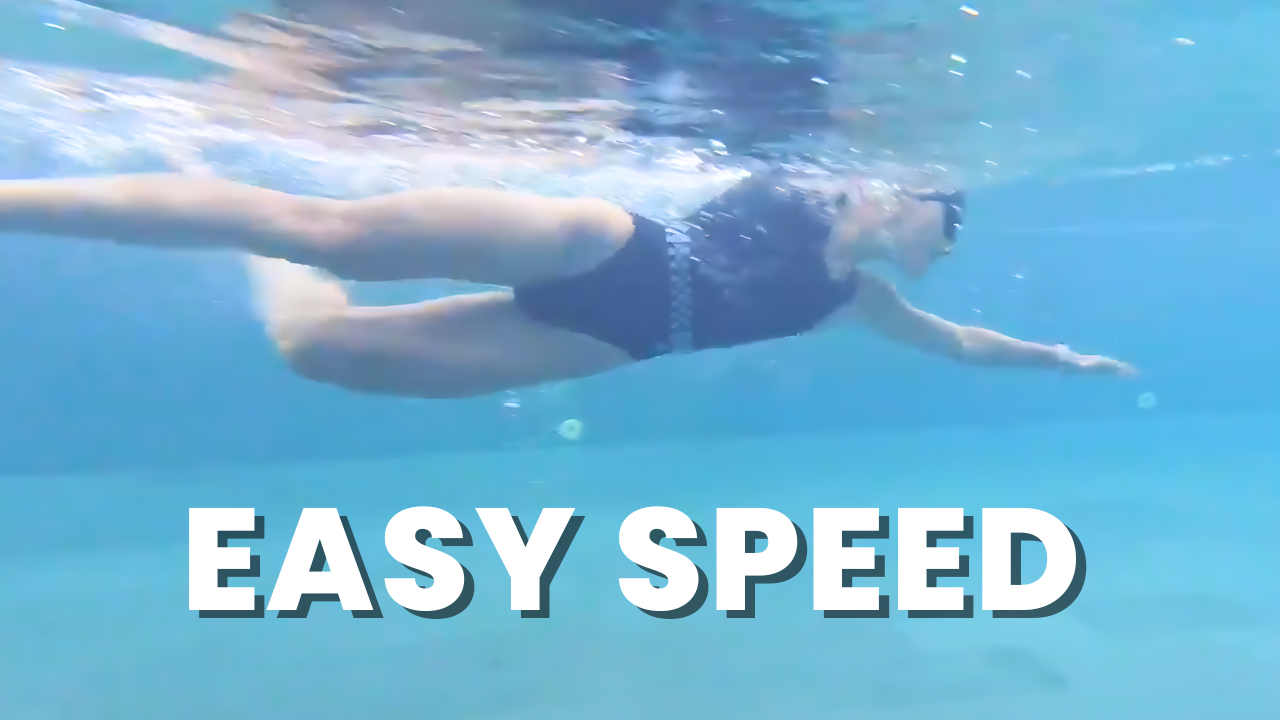
Now, in his stroke, if you have a look from the side, which we’ll skip to here, one of the things we like to look at first is what’s creating drag, and what can we do to minimize drag. Because of all the things in swimming, that’s probably the most important one to do is to minimize drag, first and foremost. So when we look from the side here, you can see that the body position, it’s not too far from being horizontal, but if we want to get to this more horizontal position and bring the legs up and bring the hips up a little bit more, then we’re going to have to make a change there.
It looks like there’s a couple of things that are contributing to this slight drop through the lower half of his body. One of the things that can contribute to it is the head position. Now, the body position is not totally controlled by the head, and if you’ve seen any of these videos before, you will know that we recommend looking anywhere from straight down to 45 degrees. Now, at the moment, he’s looking a little bit too far in front. I think that’s partly what’s causing the hips to drop down quite so low.
You’ll also see he’s got a reasonable arch through his lower back when he does look too far forwards. So it’s not all the time, but in positions like that, yeah, it’s a little bit too far forwards. So the first thing this swimmer could do is look at slightly further down. I still like to see the crown of the head or the top of the head above or outside the water. If the whole head goes under the water, then for most people they need to lift their head up to breathe.
What we like to encourage is keeping the crown of the head out of the water. The way it may feel when you change it is as though you are extending and lengthening through the back of the neck like your spine and neck are really being extended in that position there, so that could be the first thing.
The second thing we’d probably look at here is what’s happening out in front of the stroke. So if we fast forward here, if we have a look at the entry, one of the things we want to see is the fingertips going first as it enters. Now, you can see that that’s looking quite good. The fingertips are going first, then as he extends forwards here, the hand has a tendency to stay up quite high. You can see that the fingers are the highest part of the arm, and if we look at that in terms of drag, that will be increasing the drag that gets created on the bottom of the arm.
The most efficient position to get to once that hand has entered and is finished reaching forwards is to get down to a position that’s a little bit more like this, where we’ve got the fingers below the wrist, wrist below the elbow. That’s where we want to get to. The reason for that, that’s where you will create the least amount of drag and that’s where you can, then, just get straight into the catch position after that.
If the hand enters and stays up too high for too long, we call that putting the brakes on, which is where all that drag gets created underneath the arm there. Now, that’s one of the things that we find can really need to be exaggerated to be changed. So for him to get to the right depth, which thinks of it as fingertips at underarm depth, to get somewhere down there, he may have to feel like his hand is somewhere down here. And that seems like a big difference, but the thing with anything out in front of the head, it has to be exaggerated. That would probably be the second thing that we may look to adjust.
Now, we’d also look at alignment, which is where’s the hand entering and extending forwards to. You can say this is actually looking quite good, so the hand enters in line with the shoulder and reaches forwards. We call that swimming on train tracks where the hands should enter and extend roughly in line with the ear or the shoulder. That’s looking really good from this position here so there’s no need to change that.
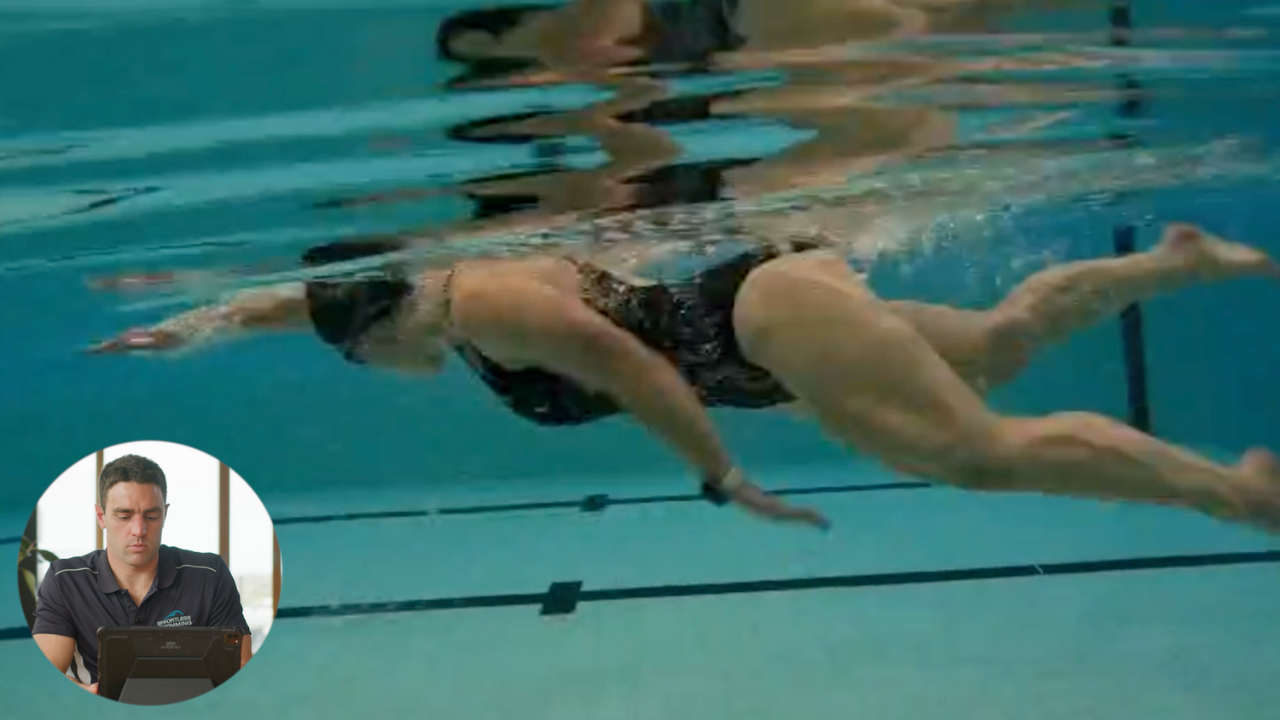
The third thing we’ll see through here is that the kick appears to be just a little bit too big. In terms of how wide, how big the kick is, particularly in that position there when he’s getting a breath, you’ll notice that the knee has quite a bit of bend to it. Information that has an angle, it’s around 119 degrees. The most you’ll see top swimmers bending their knees to is 130 degrees. If it goes further than that or under that, so 119 as you can see here, the increase in propulsion that you get from that downwards kick from the extra knee band is sort of counteracted by the increase in drag that you get from so much bend in the knee. So what he may need to do, thirdly, is just reduce the size of the kick a little bit. Keep the kick a little bit narrow, a little bit smaller there to help reduce the drag as well.
There are three things that he could focus on almost together. He could pretty much focus on all of those things together. Just choosing a couple of drills, drills like the sidekick drill or 6-1-6 drill could be really useful for just practicing those couple of things.
Now, if we have a look at propulsion, that’s typically we have a look at what are the arms doing through the catch and through the pull, and how are you connecting that with your rotation. What you’ll notice here with this left arm, okay, it’s starting in a good position here. We’ve got the fingers by the wrist, wrist below the elbow. Great position through there. Now, as it goes through the catch, you’ll say that the hand and forearm tend to press almost straight down there.
And if we look at the end of the catch which is there, you’ll see that it’s a slightly dropped elbow position. The way we define that is if we draw a line from the shoulder to the hand, that elbow is sitting below that line and so we consider that dropping the elbow. So what we’d want to look to do here is just work on a better catch position or a high-elbow catch position.
If you have seen these videos, you’ll know that you don’t need to get anywhere extreme. So for this summer to be really effective with it, it doesn’t need to get anywhere like that. For most adults, it’s not sustainable or comfortable, but if we can get somewhere just a little bit better than where it currently is, even if it looked a little bit like that, that is going to be a lot more effective because the hand and forearm will then be able to press back.
Now, that’s something that can take time, and it really just needs to be focused on. The best way that we’ve found to improve that is by breaking down that skill in the most simple possible version. And what that often looks like drill like the YMCA Drill progression that we’ve got inside our video membership where you can find a link to below. And you may have even seen a video just on the YMCA Drill, which I’ll include here as well, and you can find a link to that in the description. Drills like that can break down the skill into its simplest form and that can help you retrain that motor pattern that we want to change.
If you have a look at the right arm, a similar thing, we know that that hand stays a little bit too high, so we just want to fix that so that the hand is not above the elbow and the shoulder. And as he goes through here, he sets this one up a little bit better. Now, it’s not the best angle to have a look from but you can see that the fingertips are pointing down a little bit more. It seems to be a slightly better catch as he goes through.
The way that we’ll have a better look at this is from the front. If we skip to this view here, we’ll see that on his left hand side, all right, that left arm as he finishes there, that arm, if we look straight on, it’s going to be a little bit too straight, a little bit too deep so there’s not much bend in the elbow.
Now, if we look at that roughly as an angle, it’s 151 degrees. You’ll find that most elite swimmers are in the 100 to 120 degree range, which looks a little bit more like this. The reason they get to that position is it means they can use their lats most effectively. That’s the best position to be able to get that high elbow position where the hand and forearm is a little bit more vertical, providing more surface area as you’re pressing back.
He’s going just a little bit too deep there. So what he may need to do even using some of those YMCAs Drills, would be, that elbow probably needs to go out a little bit wider. It’s actually up a little bit higher as well. He will just need to get that hand on the inside of the elbow. So not wider than the elbow, but on the inside of it, closer towards the center. We refer to this as the power diamond. So, if you had both arms in the position that we want, it would make this diamond sort of shape. In our training videos inside the video membership, or if you come to a clinic, we refer to that position as the power diamond.
And you’ll see here on his right arm, he gets a slightly better position through here, so there’s a little bit more bend, which is good. But it’s not going to quite translate. 129 degrees might be a little bit more than that if we were looking front on. But still a pretty good position, but that elbow probably just needs to be out a little bit wider and that hand somewhere in that position there. So that’s what we’d want to work towards.
That would give them enough to work on for at least the next couple of months. And that’s really going to be those big rocks, that if we change those in the course of two to three months, you can see quite a dramatic improvement in his swim speed. Now, none of this comes without doing the work. So if he was to just focus on his technique but only train once a week, it’s not going to improve him too much. What we like to recommend is swimming at least three times a week. That’s where you can typically find the most improvement by swimming at least three times a week.
Now, if you’d like to work with us, we do stroke analysis online. You can find the link below. So if you’d like to submit your own videos, and we work on a regular basis where you will end up sending a video two or three weeks apart, and then we can continue to improve your own strokes. If you are training for Ironman events or triathlon, then we can help you bring your swim pace down by 5, 10, 20 seconds or more over the course of a number of months. And we do this daily with a number of triathletes and open water swimmers.
You can find the links below there. If you haven’t subscribed to the video, make sure you click the subscribe link and the notification bell if you haven’t already. And I’ll see you next week with another video.