
Hi, Brenton here from Effortless Swimming. This is another episode of Feedback Friday. I’ve got a special edition here where I have guest who you might have heard of before. His name is Taren Gesell, he has the Triathlon Taren YouTube channel so you’ve probably seen some of his videos before. Go and check it out if you haven’t already. So today’s episode I do a full analysis for Taren, so he’s kindly sent me his videos to do a full analysis, see what is worth working on for the next three, six, and 12 months. He swims around a 130 pace for a half-Ironman swim, so already swimming really, really well.
What we’re looking at is more the finer points of the stroke, the fundamentals are really strong. So I hope you get a lot out of this analysis and you can learn something about your own stroke in it. If you’d like to get the drills that I recommend to Taren based on the analysis, then there’s a link below this YouTube video in the description. Put your email address in, I’ll send you those drills and hopefully you can use those to start improving your own stroke. So let’s get into it, this is Triathlon Taren or Taren Gesell’s video analysis for his freestyle stroke and I hope you enjoy it.
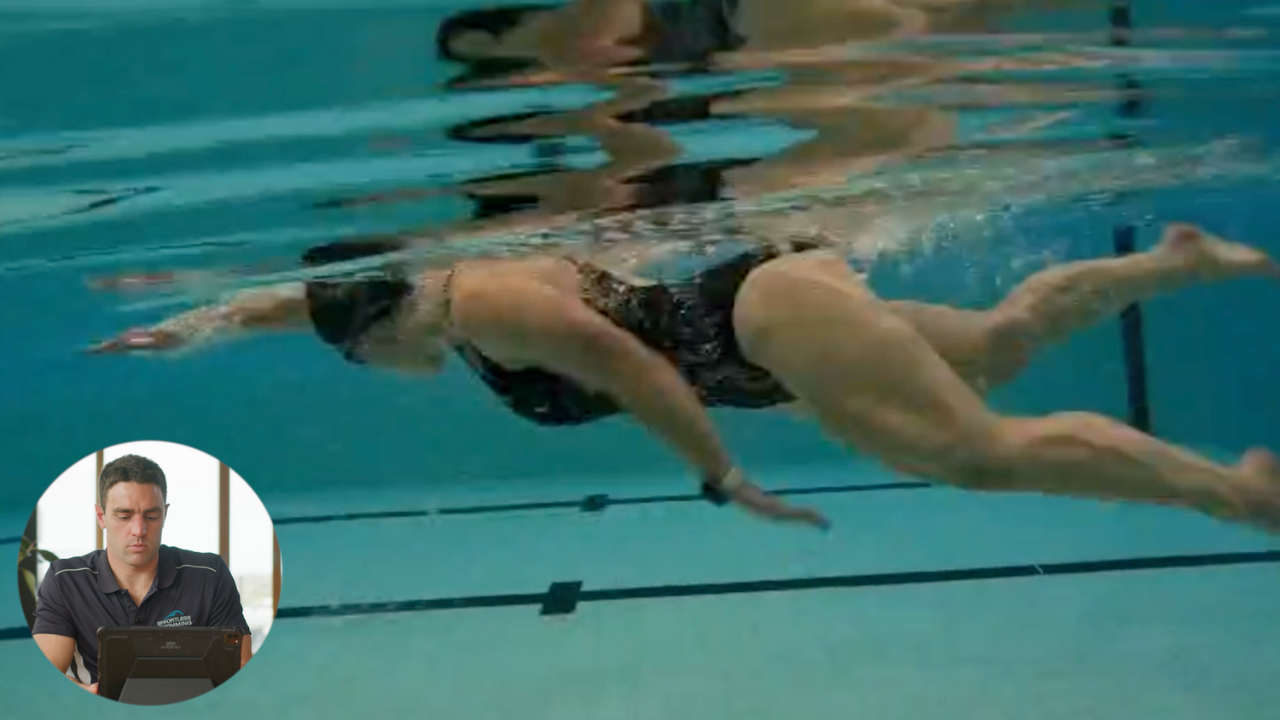
Hey, Taren. So the first angle I look at is normally from the side-view under the water. Now here I typically look at body position to start with and I like to see the three touch points of the top of the head, the hips, and the heels all at the surface. And you can see here for the most part really good lines through the body. So you’ve go your head, got your hips, heels up near the surface there. So good line through the body. You’re horizontal, we’re not creating any extra drag with the legs and the hips dropping down there. So in terms of body position, sitting up pretty well there. And if you put a wetsuit on, you go open water, obviously that will come up even higher, which is great. Looking at head position, now this is something that’s individual to everyone. But you can see here within the range that I normally like to stick within, anywhere from straight down to 45 degrees in front, you see you’re in that sort of slightly further down range. I like to see the back of the neck being extended, so long through the neck, top of the head just out of the water. So that ticks both of those boxes, which is terrific. Looking at the breathing there too you can see that bottom goggle stays in the water, so you’re getting split vision which is terrific. So really good breathing position there with the head, that’s excellent. Then what I’ll typically look at is the kick. Now we haven’t got it that much, that many views of the kick there. From what I can see here it all looks pretty good. You may be able to possibly bend the knees even just a little bit more. I’m just kinda looking at see this kick here, look at this left leg how you’ve actually got room if you want to bend that knee a little bit more in order to get the heel to break the surface just slightly more. Let’s have a look at what happens on this next kick. Yeah, same thing. I reckon that left leg, left knee, can bend just slightly more in order to get the heel up a little bit more. But overall I think the kick is working well with it. I’d like to see this whip down with the foot. So in the down kick you wanna see that coming down with a bit of a whip, that’s where you get that little bit of propulsion. And on both sides. I think you’re getting that pretty well. You can also see you’ve got good ankle flexibility there. Particularly if you’re doing triathlons, it’s pretty common to have not great ankle flexibility. But you can see you’re doing a nice downwards kick there and the foot actually sort of comes back in the line of the of the leg. So that’s terrific. Then looking at the entry on this left side. So I always like to see the fingertips entering first. Left-hand, that’s comes in fingers first which is great. And then extending out in front and getting to this starting catch position really well. So I call this the starting catch position, which is basically fingers below the wrist, wrist below the elbow, and I’m looking for sort of a long line out in front there. So pretty good starting catch position on this left side. I just wanna have a look at that on the right side. So this right one comes in, goes fingers first as well, extends out in front and again, nice position here. So fingers below wrist, wrist below elbow.
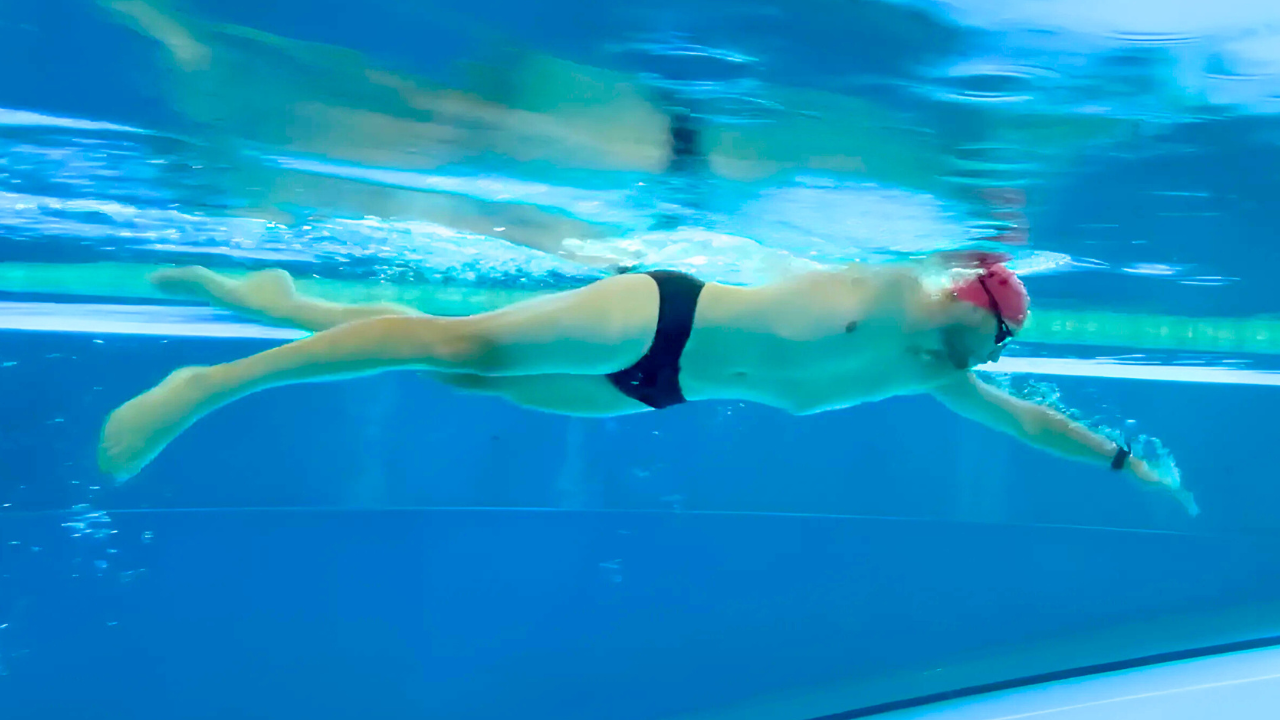
What I probably would like to try and get to, let’s say in the next couple of weeks, is just looking at this position here. When I’m normally looking at this side view, I like to see the hips rotated just a little bit more. So this left hip here, probably like to see that lift up a little bit more. And possibly just a bit more rotation through the shoulders in order to reach out a little bit further. So I think you’ve got room to kind of just extend, reach slightly more by rotating with the hips and the shoulders just a bit further. And it’s kinda like you wanna make it feel like you’re reaching for something just slightly out of reach. And the reason I say that is because when we look at the top view, I’ll show you that I think we can kind of make a longer, narrower line through the body if we can do those two things, which is rotate a little bit more and reach out a little bit more. The other thing I’d probably look to do is just kip the arm out in front, kind of spend a bit more time with this arm kind of sliding or surfing out in front just a little bit longer. So I’ll play it here for you. To me, I think that the hand probably goes into the catch a little bit too soon. Now, it’s slightly different if you’re doing triathlon in open water, the stroke rates often gonna come up a bit higher than what it will in the pool. But that said, you can still spend that little bit of extra time in this reach phase. Because what tends to happen there is you kind of get this last bit of travel and distance per stroke while the hand here is pressing back. And if this goes too early into the catch, one, it can make it a little bit harder to set up a nice high elbow catch, but also you just miss out on that last bit of distance per stroke. So I’d just look to add a little bit more bridge extension, just making it a little bit longer in that phase of the stroke.
Now, then looking at the catch. So the way I sort for define a high elbow catch is if we were to draw a line from your shoulder to your hand, the elbow will be above, so on this side of that straight line. So that’s how define the high elbow catch. Now, obviously you don’t need to go for something extreme like a 90 degree catch, takes crazy amounts of mobility and strength to be able to hold that. But what I would typically like to work towards is over time incremental improvements in this position here. So see where that right arm is? If we just sort of pause it in that phase of the stroke, so it’s a slightly dropped position, but I still think you hold very good water. Like if you’re swimming 130s for half-Ironman, you’re obviously swimming well. So I think this is still quite a good catch position, but let’s say in the next three to six, possibly 12 months, if we can get this being a little bit further forwards, sort of higher than that straight line. That’s gonna be a huge improvement in your speed. That’s where I think for the most part that 125, eventually 120 can come from is by improving that position. so let’s say a lot of the pros will typically be somewhere up around here. So what that will change will just be the direction of the forearm, the hand as it presses back. So I can see with that green line, it’s primarily gonna be pressing back on the water. Where you currently are, still not bad, pressing back, but primarily down on the water. So that’s kind of what we want to incrementally improve. Now in terms of how you go about that, there’s some drills that I’ll give you that will help with that sort of position. And it will take time, it will probably feel a bit awkward in the beginning. It’s not gonna happen straight away, but over the next three, six, to 12 months you can really make some big gains with that and I think it’s worth focusing on. Just to show you this left side as well. Similar position just in terms of if we draw that straight line from the shoulder to the hand, elbow sits just a little bit below it which is common. Most people tend to sit there. But as I said, over the next couple months working towards that sort of position. So like I said, doesn’t need to be really extreme, but even just a small improvement is very noticeable in terms of your time and your speed. So that will be really the key thing. And the other thing is just that extra reach and rotation there. So that’s the side view. Now just showing you what that looks like from the front. We’ll just bring it back here.
Okay, so looking at this from the front there’s a few things that I normally look for. First of all, here. Okay, so I just wanna show you the angle of the shoulder rotation here. Now looking from the front what I’ll typically see is with the fastest swimmers in triathlon or the pro swimmers, they’re normally somewhere from about 32 degrees up to sometimes a maximum of about 45. But normally sitting around a 35 to 40 degrees, so you can see your shoulder rotation’s about 32, which is why I think we can just get slightly more shoulder rotation to help with this extra reach. Then just with the catch. So starting in a great position, you’re in line with the shoulder here. So hand’s inline with the shoulder right there. Then you can see here as the fingertips point down, really good job of that. Fingertips pointing down. This angle here, so normally I’ll look for it to be 100 to 120 degrees. 125, you’re not far at all from that ideal angle, so 100 to 120 is where you wanna be. So in order to make that change, what I will often try and get to is shoulders, upper arm one straight line, then the hand, forearm kind of not quite there. But having that in one straight line and then the forearm and the hand somewhere on the inside of that elbow. So you can see it’s about 104 degrees. The biggest change is really this elbow and hand has just gone out in that direction. That’s the main change. And the reason that we’d like to try and keep that as one line instead of one, two, three, so the shoulders, upper arm is one line, is that’s when you can really engage the lats well. And it’s like if you try and pull yourself out of the pool with the arms in that position just where the elbow’s sort of forwards of the shoulders, you don’t have as much strength there. So that’s what I’ll typically see with those really top swimmers there is that all inline. So that’d be the change on the right arm. On the left arm, so here left arm. If we measure that angle, let’s have a look. Probably a little bit straighter than the other one, so 145. So if we were to get it out to that 100 to 120, again, trying to get the shoulders and the upper arm in one straight line, hand on the inside somewhere like that. So basically I call this like a half-diamond shape there, so it’s like a half-diamond shape. So a bit more bend in the elbow, maybe not quite as deep with the hand. That would sort of come up and out to the side there. Again, don’t worry too much about how to go about that yet. I’ll give you some drills to work on that position there. But once you can get the arms in that sort of angle, if we look from the front, that’s gonna be one contributing factor to getting to that higher elbow position in the pull through. So that’s really the key, I really think that’s what’s worth focusing on. Just looking at the other angles, I won’t spend too much time on them ’cause I think you’re doing really well, is over the top here. I like to use the analogy of swimming on train tracks in terms of the hand should enter roughly inline with your ears or your shoulder when it goes in. And every time it does that, it should reach and extend on those train tracks. We wanna try and avoid any sort of crossover here. You do a really good job of entering left hand inline with that shoulder out in front. Same as the right side, right in line with that shoulder extending forwards, again, on those train tracks which is great. Now just from this view here if you can see this. So see how when you’re at full extension on the right side, this right arm isn’t completely straight? There’s a bit of a bend in the elbow. And to me sort of here, it looks like you’re a little bit flat through the hips and through the shoulders. So if you can just kind of get that extra rotation that I was talking about before and straighten that arm, reach out a little bit more, it’s going to make you a little bit longer in the water. Plus, it’ll make you narrower in the water in terms of if we look at this from here, that extra rotation you’d probably fit in between those sort of green lines. And yeah, it doesn’t look like a whole lot of change, but any extra drag that you create in the water is really magnified because of how thick the water is. So that would just be the change I would be looking for there. Timing looks really good in terms of when you’re pulling through. And then the final shot from here above. Right, so with your recovery, I think you’re recovering really, really well. This is a great angle. So the elbow’s relatively high, fingers are out to the side and the hand’s relaxed. So 102 degrees through there, typically what I wanna try and aim for. And then same on this left side, nice, open recovery. Great for open watering swimming and triathlon. So I think this recovery position is terrific, 112 degrees. So the one other thing I just wanna point out just briefly which I didn’t mention before that may contribute to that extra reach out in front is the exit of the hand here. So see this position right here? If we draw a line through the forearm and the hand and then kind of trace it as we go, so it’s coming up in that direction there. So if we look at that in terms of where’s the hand or the forearm pressing, see how it’s kind of coming up towards the water? So if we look at that from a propulsional or the direction of the force there, it’s more coming up in that direction. So I think if we can get a little bit shallower at the back of the stroke, so instead of coming up in this direction, we can get the palm of the hand or the hand pressing back past the hip, that will be a big change from two sides of things. One, just kind of finishing off the stroke with a little bit extra, plus it’ll make it a lot easier to then keep this arm out in front a little bit longer too. And I think it’s probably similar on the left side, although it’s a little bit harder to see. But yeah, I reckon it’s just finishing a bit too deep there. So what you’ll normally see, actually I’ll pull up another video now just to show you. So if we look at this, on the right hand side is Clayton Fettell, he’s a professional triathlete, normally one of the first guys out of the water. You can just see this change or the difference here. So you can just see that his elbow is near the surface there and the fingertips are facing down, here the fingertips are facing back. And then if we kind of move this through altogether, just see the direction that he’s pushing back. So the palm, the hand pressing back there. At the moment the palm hand’s facing up. So we wanna try and essentially get the palm of the hand continuing to press back just past the hip there and I’ll show you in slow-motion again. So we can just see that difference. So that’s how he’s able to get just that little bit extra out of the stroke, plus, well he’s got a really sort of long stroke and very efficient there. So that’s another thing that I’d probably look to work on there.
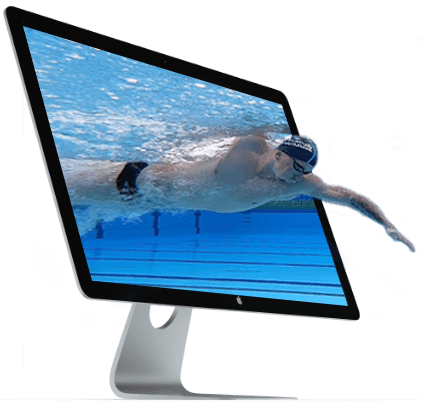
So then the question is all right, so how do we go about making those changes? What I’ll do is send you some drills that are specific to each of those key points. And all I’d recommend doing is within your warmup, every time you swim is practice those drills for four to six 25s each within your warmup working on each of those things. And then just go about your normal swim session, because what we’re looking to do is essentially change your habits, change your motor patterns that you’ve built up over time. And the best way to change it is to as often as regularly as you can be focused on those key points. And often it can help to do drills to break down each of those things in a more sort of isolated or specific movement and really focus on it and concentrate on it. So I think in the next sort of three to six months there’s a really good chance that you could bring that pace down, sort of half-Ironman pace, down under that 130 to 125 and then onwards from there. So yes, it takes time, it takes practice, but swimming really, really well already and I think with these three changes that can really make a difference in your stroke over the coming months and years. Good job. I hope you enjoyed this episode of Feedback Friday. If you wanted to get the drills that I gave to Taren to help work on each of those things, there’s a link below. Click on that, put in your email address, and I’ll send you those drills. And if you’ve got any similar things that you’d like to work on with your stroke, they can be really effective drills. Now, if you’d to get video analysis done of your own stroke, then this is something that I do on a daily basis with our members.
So the Effortless Swimming membership is where people record their swimming, either with an iPhone, with a GoPro, whatever camera you’ve got, you can send footage in to me. And then on normally a pretty regular basis, every three to six weeks, most members will send in a video of their stroke. I’ll do an analysis, give you some specific drills to help make adjustments and corrections in your stroke. And put together a bit of a plan of attack for you going forwards to help get your swim times down, make swimming hopefully a bit easier, come out of the water feeling fresher, and obviously get the speed up as well. Now swimming’s a learned skill, so it’s something you can improve. I know when I was growing up I felt like sort of hit a bit of a plateau like I was stuck for awhile and I didn’t know what I could do to get faster. Because I was training as hard as I possibly could and I felt like I was hitting my head against a brick wall for a while. But, really a lot of it will come down to technique. So with your GoPro, with your iPhone, if you can record yourself swimming, I can give you some really detailed ways to go about making those changes. It’s not gonna happen straight away, you’re not gonna get faster within one day. It will take time, but time you’ve got on your side. So that’s often if you have that approach, the longterm approach, then it’s a lot easier to go about making those improvements. If you’re committed to working on that stuff for at least six months, but ideally 12 months and onwards, you can get faster, you’re not stuck where you are. So if you’d like to work on your own stroke, check out the Effortless Swimming membership. That’s where I am on a daily basis working with swimmers from all over the world. Thanks for watching, I’ll se you next week.