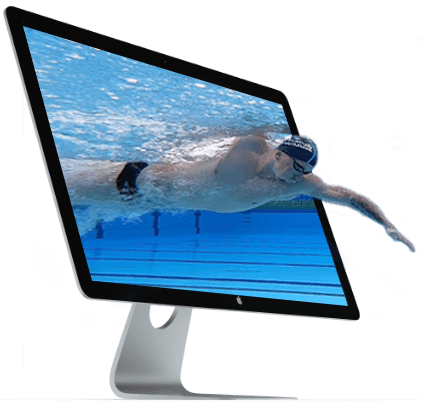
If you’re on any sort of underwater filming, whether that’s in one on one sessions with your squad or with your group then I’ve been using a really good little set up. (These days we sell a complete underwater filming bundle in the shop.) It doesn’t cost too much money but allows you to get high quality video and get every single angle that you need to provide feedback for your swimmers. It’s a GoPro Hero 3 which is the latest model.
More details on the GoPro Hero 3
More details on ‘The Bobber’
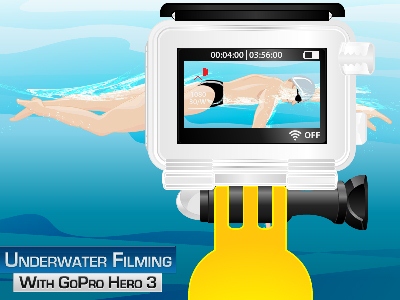 We’ve got a thing called the Bobber, a flexible coupling and a piece of pvc pipe. Now, what makes this such a good setup is that it allows you to walk alongside the swimmer as they are swimming, you can hold it in front of them as they are swimming, and you can also hold on top so you can get an above water angle as well. And they’re the main angles you wanna see when you are doing one on one feedback when you’re doing stroke correction because it allows you to see how they’re pulling through, what their body position’s like and what are the kicks they’re doing and it’s all done without a big expensive setup.
Let’s go into a bit more detail. We’ve got the GoPro Hero 3 which compared to previous models they had a very fisheye effect, which meant that some of the angles were distorted if you ever look back at the footage. This is more like a normal camera, you can actually see the proper angles that the swimmers are pulling through with under the water.
It’s got a thing called the bobber, which is a plastic handle that attaches to the GoPro. It’s worth about $30. You can buy them online. I found one in an electronic store here. We’ve got a ‘flexible coupling’ which just attaches this piece of PVC pipe to the bobber. And because it’s so long you can, that’s why you can walk alongside the swimmers. You can have it above them. And just means that you can get footage as the swimmers are actually swimming, as opposed to using, for example, a flip camera with a waterproof casing where you can’t really walk alongside the swimmer as they’re going.
So this is very good. It means you don’t need to bend down or anything like that as you’re filming and you can get high quality shots under the water. So the Gopro Hero 3, it provides 1080p video so it’s high definition and it provides 60 frames a second so you can really break down the swimmer’s stroke with 60 frames a second. So if you need to do any kind of filming, like I’ve been doing with one-on-one sessions here at MSAC.
I’ve been working with a lot of swimmers one on one where we do underwater filming and then stroke analysis, so we’ll look at the footage on the computer, then we’ll jump in the water and we’ll go through some exercises and some drills to help them correct any mistakes they might have been making with their stroke and it helps them swim faster, be a lot smoother in the water and obviously makes us more efficient and faster. So, the way we’ve been able to do that is with this neat little set up.
I highly recommend something like this. It’s not like a $2000 or a $3000 setup that you used to have where you have to have a big tv screen and your expensive camera that is outdated in about a year’s time. So this is a great setup to use. I highly recommend it if you want to get any kind of underwater footage.
That’s it for news this week. I hope you got something out of this video. I’ll be back next week with more tips.
Book an underwater filming and video analysis session
Transcript
Read the full transcript
If you’re doing any sort of underwater filming, I’ve got a great little setup that will help you get great quality footage. Bretton 40 with another Effortless Swing.com update where swimming fast is easy. If you’re doing any sort of underwater filming, whether that’s in one-on-one sessions with your squad or with a group, then I’ve been using a really good little setup that doesn’t cost too much money, but it allows you to get high quality video and get every single angle that you need to provide feedback for your swimmers. It’s a GoPro Hero 3, which is the latest model. We’ve got a thing called the Bobber, a flexible coupling, and a piece of PVC pipe. Now what makes this such a good setup is it allows you to walk alongside the swimmer as they’re swimming. You can hold it in front of them as they’re swimming, and you can also hold it on top so you can get an above water angle as well. And they’re the main angles that you want to see when you’re doing one-on-one feedback,
when you’re doing stroke correction, because it allows you to see how they’re pulling through, what their body positions like, what their kick’s doing, and it’s all done without a big, expensive setup. So let’s go into a bit more detail. We’ve got the GoPro Hero 3, which compared to previous models, they had a very fish-eye effect, which meant that some of the angles were distorted if you ever looked back at footage. Whereas this is more like a normal camera, you can actually see the proper angles that the swimmers are pulling through with under the water. We’ve got a thing called the Bobber, which is a plastic handle that attaches to the GoPro. It’s worth about $30. You can buy them online. I found one in an electronic store here. We’ve got a flexible coupling, which just attaches this piece of PVC pipe to the Bobber. And because it’s so long, that’s why you can walk alongside the swimmers. You can have it above them, and it just means that you can get footage as the swimmers
are actually swimming, as opposed to using, for example, a flip camera with a waterproof casing, where you can’t really walk alongside the swimmer as they’re going. So this is very good. It means you don’t need to bend down or anything like that as you’re filming, and you can get higher quality shots under the water. So the GoPro Hero 3 provides 1080p video, so it’s high definition, and it provides 60 frames a second. So you can really break down the swimmer’s stroke with 60 frames a second. So if you need to do any kind of filming, like I’ve been doing with one-on-one sessions here at MSAC, so I’ve been working with a lot of swimmers one-on-one, where we’ll do underwater filming, and then stroke analysis. So we’ll look at the footage on the computer, and then we’ll jump in the water, and we’ll go through some exercises and some drills to help them correct any mistakes they might have been making with their stroke, and it helps them swim faster, be a lot smoother
in the water, and obviously makes us more efficient and faster. So the way we’ve been able to do that is with this neat little setup, I highly recommend something like this. It’s not like a $2,000 or a $3,000 setup that you used to have, where you have to have a big TV screen and an expensive camera that is outdated in about a year’s time. So this is a great setup to use. I highly recommend it if you want to get any kind of underwater footage. That’s it for news this week. I hope you got something out of this video. I’ll be back next week with more tips. Have a good week.