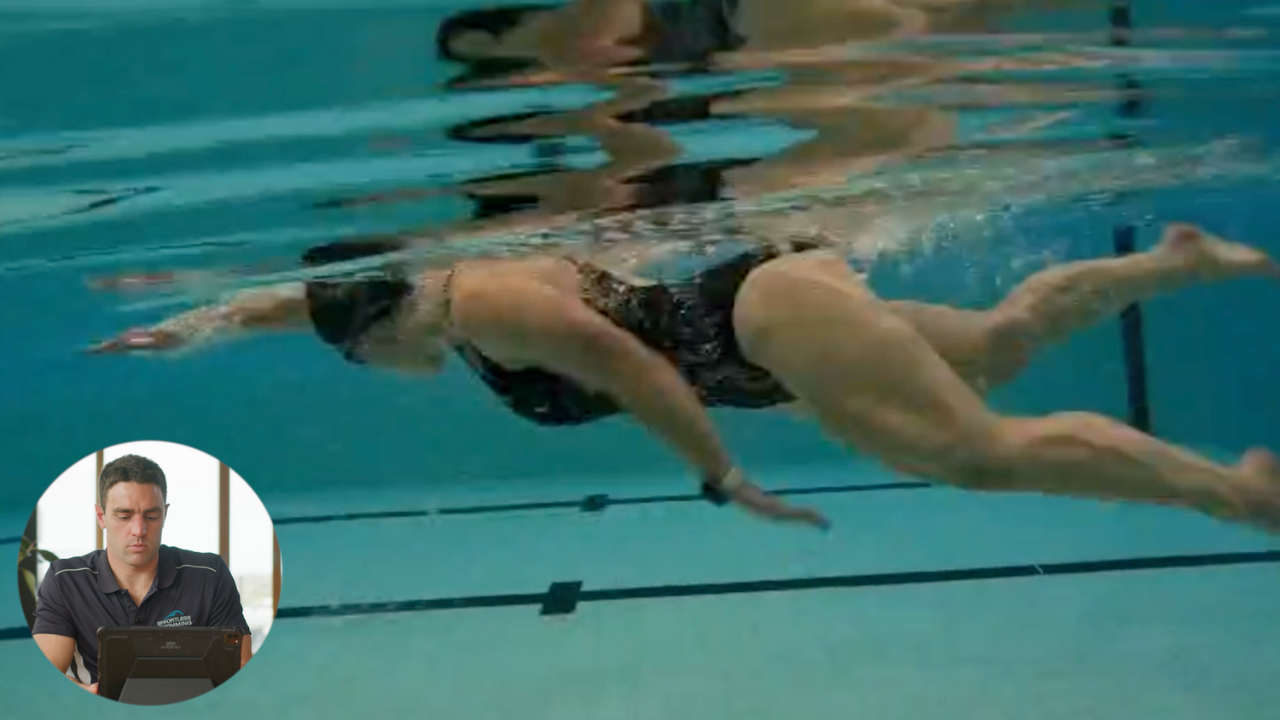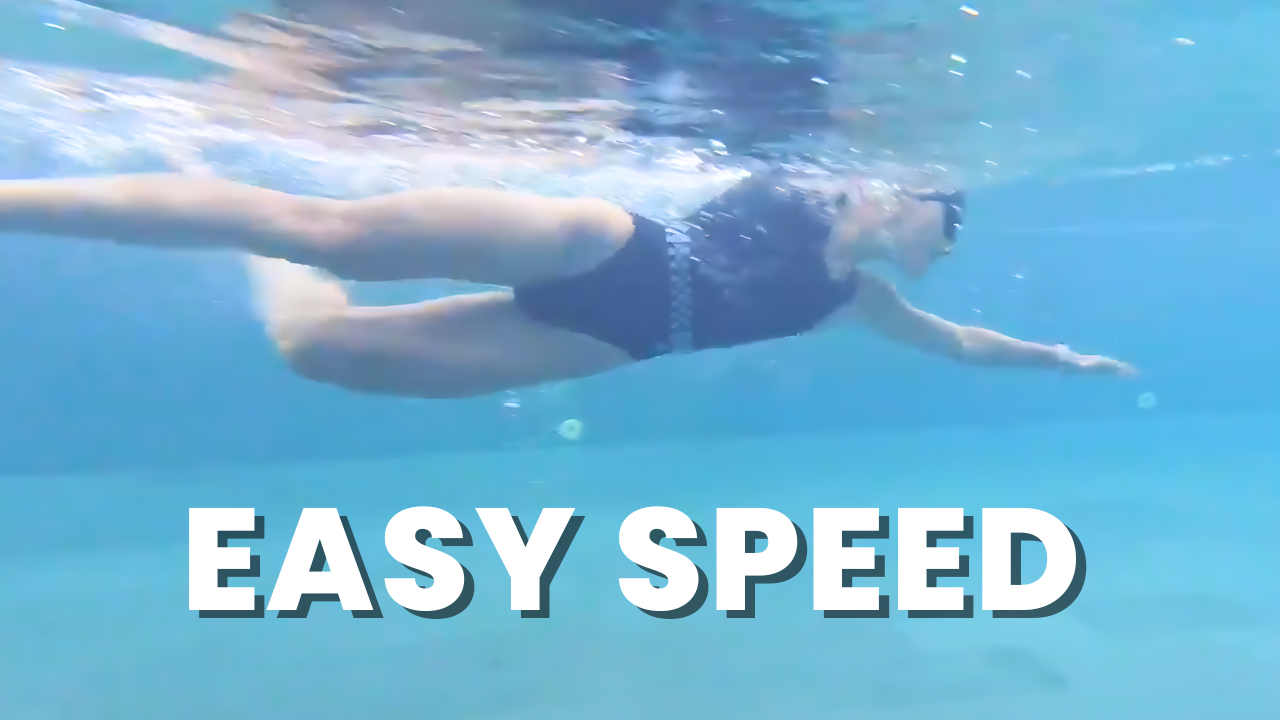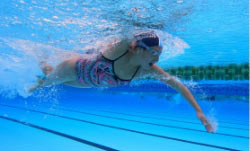

The first thing we normally look at is his body position and with the body position, we want to see the three touch points at the surface which are your head your hips and your heels. We want those three touch points to be at the surface, if they’re there then there’s a good chance that you’ve got a nice horizontal body position you can see at the moment how this swimmer is just dropping a little bit through the hips and the legs and the reason we want to try and avoid that is it’s just extra drag on top of his legs. As you can see, one of the first things or the most important thing to do in swimming is reduced drag because it’s multiplied so much in the water. A number of things can cause the hips and the legs to drop often, it can be with the breathing, sometimes it can be over rotation or just simply balance so we’ll have a look through that and then make some recommendations. So you can see that the body position just sitting a little bit low. If we can start to bring that up it will help a lot. He’ll fill up a lot different and if he’s got a wetsuit on, obviously that’s gonna be fixed but if you can get the right body position without the aid of a wetsuit or a pool boy, it is going to help you in your swimming even if you are racing in open water.
The other thing we’ll look at is head position and there’s a range that I normally look to keep within which is anywhere from around straight down to about 45 degrees in front anywhere in that sort of range is fine. The main thing I like to see is quite a long neck so if the chins too far forwards and we’ve got all these sorts of wrinkles in the back of the neck normally that means that their posture isn’t as good as it could be and it can be affecting the rest of their stroke. So you can see here, it might be within the right range I’d probably want to play around with our experiment looking a little further down and possibly just extending the back of the neck a little bit more. The top part of his heads is out of the water which is good. One thing that I would experiment with is looking a little bit further down. How would we experiment with that? To find the ideal position well normally I’ll get the swimmer to go 100 meters the first 50, I’ll get them to look far forwards, look down, go in between. Notice if there are any changes through your hips through your legs. See if a change in head position impacts these two things here and then on the second 50, just settle into a position that you feel will suit you well and it feels best for you. That’s how I’d normally experiment with head position. That might be the first thing that we’d look at possibly adjusting but it’s different for everyone so there’s no one ideal head position.
The next thing that we’ll look at is the kick. You can see here with the kick, occasionally the legs display a little bit wide. You can see probably just kicking a little bit wide here. Now most of the time, if the legs are kicking too far apart, it’s from what’s happening out the front. if you over rotate through the shoulders or through the hips or you have a big crossover, that will often cause the legs to display out quite wide. I don’t normally focus on this too much we just want to focus on getting this part out in front right. With the actual kick itself, ideally, we want to see the heels breaking the surface every couple of kicks. You can see occasionally that the back of the heel does come out but just sitting a little bit low. We could sort of look at ankle flexibility that’s something that does take a long time and for a lot of triathletes, we don’t focus on it too much. I normally just try and keep the legs up a little bit higher. Sometimes, by engaging your glutes and your hammies a little bit more to bring the leg up slightly straighter. What I like to try and get to or what I like to see is for most of the kick to get the leg or the thigh above the line of the hip. It’s not going to always be there obviously, you still need to keep but if the leg or the line of the leg is sitting below that line of the hip for the majority of the kick, then it normally means that the glutes and the hammies are being engaged enough and that’s something that we’d want to look at. Like anything is forming you want to be able to engage this to the point where it’s switched on but relaxed. If it’s too tense and you’re very rigid and too tight through there you’re going to be wasting your effort and energy so it’s that fine balance like we see with a lot of things in swimming.
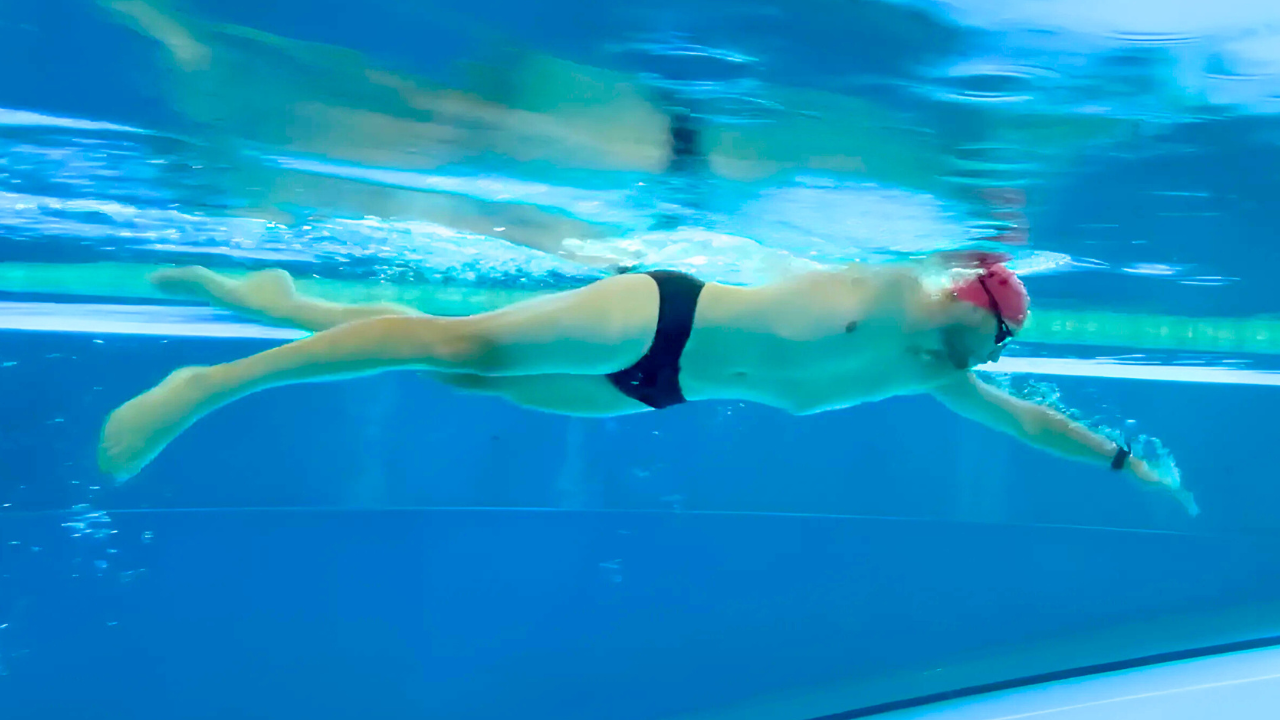
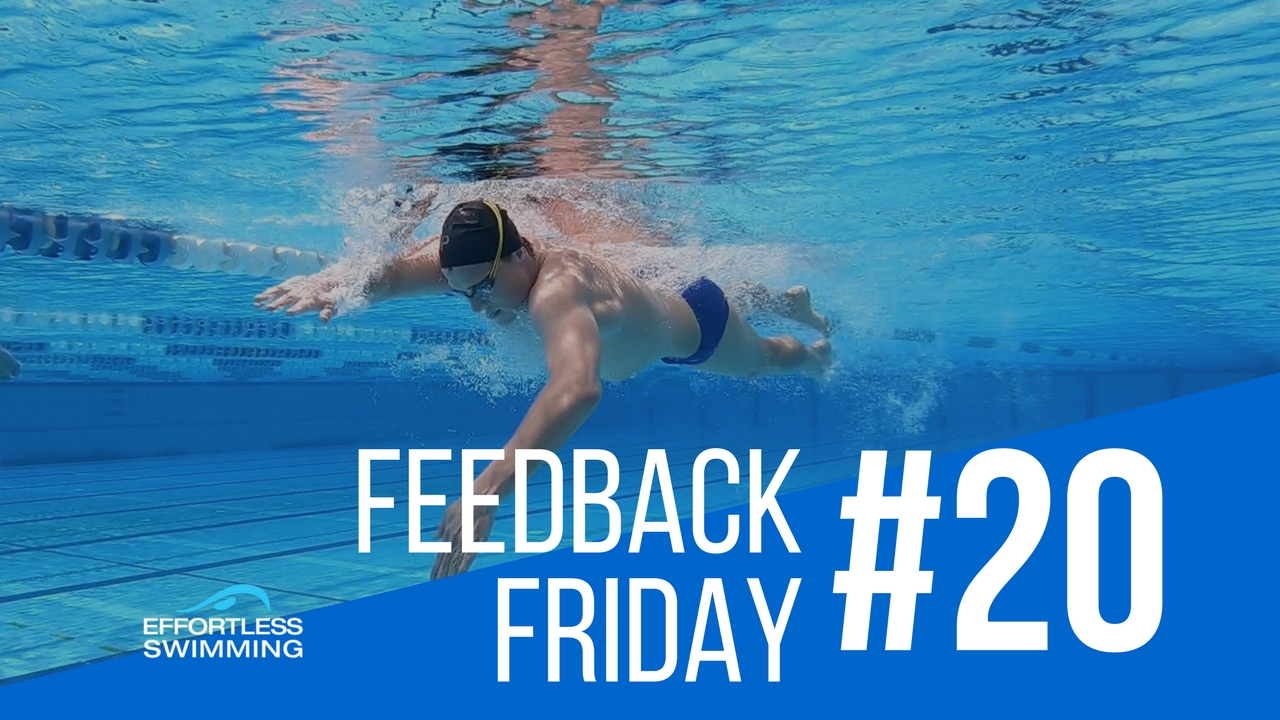
Then after that, we’ll look at the entry. What we want to see with the entry is fingertips going first, we want to see the fingertips going first then reaching and extending out in front. I normally like to see the fingertips below the wrist, the wrist below the elbow and have the fingertips just a little bit deeper than the armpit. You can see here as he begins the catch, you’ll start to notice the elbow somewhat drops not too much but it is sitting just a little bit low and the main thing I’m looking at here is the angle of the forearm. If we look at that forearm, you can see which direction that’s facing primarily down. Now if we want to move forwards, we’ve got to apply pressure and force back in that direction so you can just see with the forearm at least through that early part of the stroke. It’s primarily pressing down on the water. We want to be able to adjust that so sometimes it can just be caused by pulling through with the elbow too early or allowing it to drop. In this case, to me, it actually looks like the shoulder is going down a little bit too deep most likely causing him to over-rotate through the shoulders and he’s probably coming underneath his body a little bit too much. It’s going to be really hard for him to maintain a somewhat high elbow position. Now with this high elbow position, you don’t need to go for an extreme position like an Olympic catch level position. We do, however, want to keep it the elbow somewhat forward so the way I kind of look at that is if we draw a line from the shoulder all the way through to the hand. We want to see this elbow above this straight line to me that’s an elbow that’s been kept forwards or in a high elbow position. Anything below that, it’s dropped if it’s in line with that line then that’s okay too. Ideally. somewhere above the line here. It doesn’t need to be extreme. Most adults don’t have the mobility through the shoulders to be able to hold that sort of position or maintain it or the strength. We just want to have it somewhat being kept forwards, it doesn’t need to be extreme. Looking at that, we can see that with the catch not setting up as well as we’d like to from this position. As he comes underneath the shoulder, we do want to see the shoulder, the elbow and the hand pretty much line up when you come under the body. A friend of mine, Eney Jones, she calls that, one happy family. You want to keep that in a pretty much a straight line.
The thing that stands out the most to me is the shoulder, it is below the line of his head, normally the motion is that I want to get them keeping the shoulder up near the side of their face a little bit more. As soon as that drops down, it’s very hard to engage your lats to pull through. It means that the shoulders almost kind of out of the socket a little bit, It’s in this weaker posture, that doesn’t allow much strength in the stroke. What we’re probably going to look at from this front view is less rotation through the shoulders, keeping the shoulder up near the side of the face. We can see with this right arm, the similar thing that elbows just dropped a little bit the angle of the forearm and the hand pressing primarily down over time. This is the hardest thing to work on, this takes the most time but over time we want to start to keep this elbow somewhat forwards.
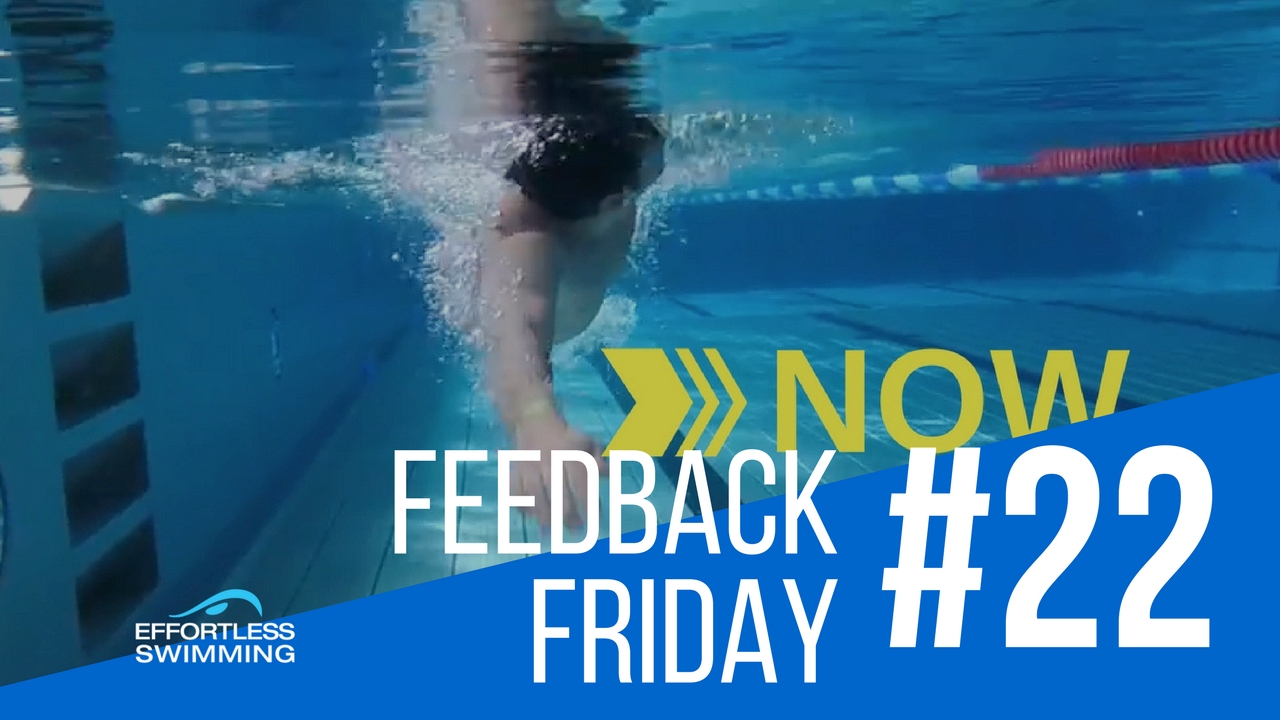
Even if he gets to that position in let’s say six months time, sometimes it will take less than that and it will take longer for different people. Everyone’s different but for most people, if they focus on improving this, that’s normally where they can find the most improvement. Everyone is different but for most people, that’s what I’ve found, they can always improve their catch and pull position. It does require you to have the correct amount of rotation and to be able to keep this shoulder somewhat near the side of the face or the cheek and not drop it down. Sometimes, if we just try and work on that straight away and we don’t fix this, then you are not going to get where you want to get to because it’s almost physically impossible to get this really good position. If we don’t fix this rotation all right so let’s just keep going through here just have a look at the back of the stroke. You can see there with this left hand it just comes under the body a little bit too much. It sort of drifts out, you can see how this back part of the stroke is quite short. From here what we want to see is the palm actually facing back. Behind him, you can see it’s turned into the hip, that’s turned into the hip which just means there’s nothing that’s really pressing back that way to give him propulsion and right here the hand just kind of gets drawn out a little bit early. We’d want to see a bit more tricep extension out the back the of the forearm the hand pressing back just a little bit more to give him this little bit of reach and extension and glide at the front. Now, we’ll have seen in one of our other feedback Friday videos that we don’t want to push back so far and get and through our balance off but we want to form the right amount of tricep extension or press at the back. Now let’s just fast forward to the front view you now from this front view. There’s a couple thing I like to look for. We’ve already seen from the side that he’s probably over rotating through the shoulders and what I would normally do if I had this shot looking pretty much at the same height as him. I’d look at the shoulder rotation at its furthest point. It’s a little bit hard to see so it’s probably not going to be that accurate but we’ll just see if we get a rough idea. He’s around 43 degrees possibly a little bit more just depending on this angle. You know normally I’d like to see the shoulders rotated anywhere from around 32 degrees up to at most about 45 degrees, any more than that it’s normally going to cause a bit of overall rotation. Again, each person is different but that’s usually the range I like to to be within and you can just see here on the entry point, it enters in line with his shoulder which is good and right there, the hand is in line with his head. He’s just crossed the center, this shoulder which you can sort of see has just gone a little bit too deep. We want to try and close that gap up. He should be around there, close that gap up and see as he goes through this part of the stroke. Once he’s underneath the shoulder, this is the position where we really get a good idea of how someone swings or how they’re catching the water. It would typically measure the angle of the arm. Now you can see is at 138 degrees, which is just too much of an angle. All right, so he’s through straight, he’s through deep with his arm but the thing that stands out to me the most is where the actual arm is. Now, the power position in freestyle is a little bit like a diamond, so if we did that on both sides that sort of diamond position with both arms, that’s where you’re going to be engaging your lats you’re going to be able to stabilize your shoulders and that’s where you’re going to
find a lot of power. It’s like a half diamond position or a triangle on the side. The elbow needs to be pointing to the side, so it’s got to be out here and the fingertips pointing somewhat down. The other thing as well as with his shoulders we’ve got that line with his shoulders. The upper arm is here and then the forearm is there, so you can see how that’s three different lines. Now one thing that I picked up from Gary Hurring, a former Olympic coach for New Zealand and a former Olympic swimmer. I coached with him in our Hawaii camp, which we’re running again next year in 2019. One of the things that he mentioned was, we want to see two lines here once you’re underneath the shoulder so the shoulders and the upper arm is one straight line, the forearm and hand is another line that’s where you can really apply power and that’s what you’ll typically see with elite swimmers. You’ve got two lines instead of the three different lines like you can see here. What would we recommend to you is we’d want to come out a little bit wider. Get that elbow out and get the fingers here and again. That’s one of the first things we’ll do. Just close up the gap through there. There’s a drill inside the Effortless Swimming Membership which is called shoulder to shoulder to cheek scoop and it’s where you’ll actually hold a paddle in between your shoulder and your cheek, you’ll hold a paddle here and you’re going to do a little bit of a skull with this arm so just repeating a skull and that’s a really good drill that I got from Miguel Lopez in Thailand where we run our camp. I got that drill from him and that’s a great one. Just to set the shoulder up in the right position, so that’s the the right arm and you can see again that’s just where it comes a little bit too far underneath the body. It’s across the center of the body than with the left one, let’s have a look here and this is where it gets the breath. This is where that most of the overrotation is coming from. It is on the breathing stroke, if this is actually measuring correctly, he’s rotated to about 70 degrees. Remember, he wants that around 32 to a maximum of 45 degrees. He’s just over-rotated, that shoulders went down really deep and see here where it’s across the center and we’ve got those three separate lines so similar recommendation on this side it would be to rotate less so don’t over rotate when you’re getting the breath. We want to try and keep the shoulders in one straight line somewhere like that and have the arm there and we want this arm to be an angle of 100 to 120 degrees, so the actual angle that is that is 144 all right so for him there just a recap less rotation through the shoulders keep the shoulder up near the side of the face and and that should help get him point through a little bit wider out. Setting up the catch, we’d also give them a few other drills just our sort of three-step drill progression for developing the catch which has been working really well. I’d also give him that just to continue to work on but it all starts from getting this stuff right first. That’s the key thing that I’d take out of this video here. Thanks for watching I hope you enjoyed this episode of Feedback Friday. If you’d like to get coached by me, have video analysis done on a regular basis make sure you check out our Effortless Swimming membership which is at effortlessswimming.com/membership. That’s where I coach people from all over the world on their technique and their swimming, to help them become better triathletes, open water swimmers, and pool swimmers. Thanks for watching, I’ll see you next week.